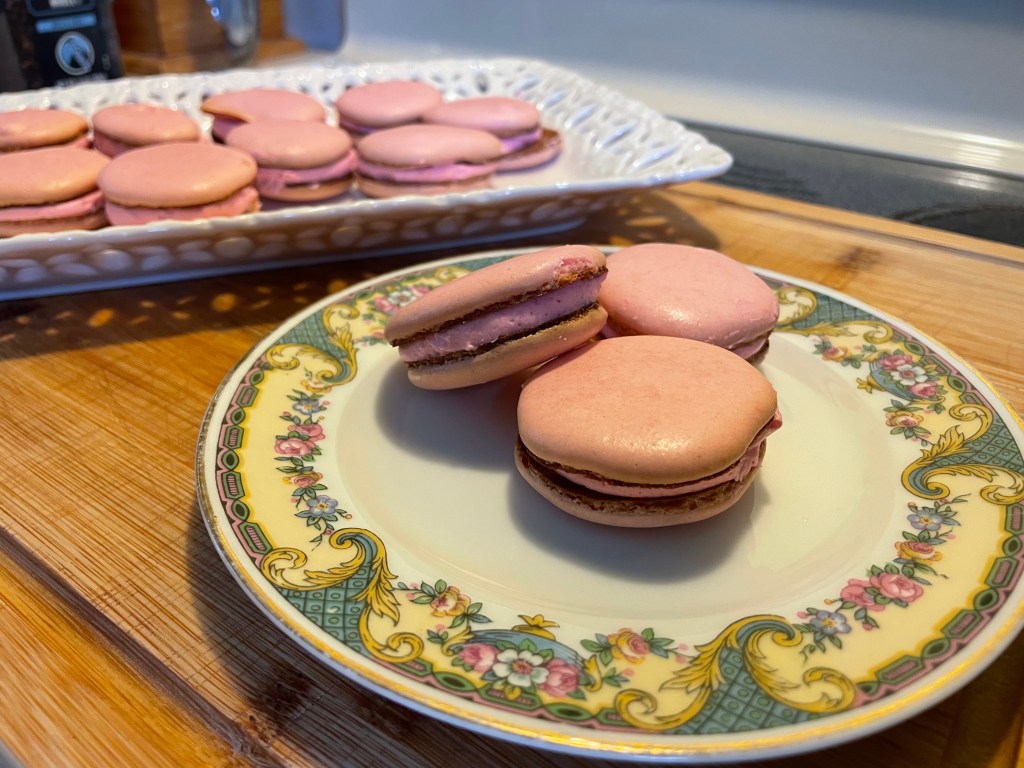
AKA: My macarons have feet! I made macarons! With feet!
It was great fun to imagine a meal of small plates that our characters would enjoy in this particularly unforgettable locale: partway up a Walking Statue! All dressed up for their first visit to the Lightsinger Theater. Here are a few dainties worthy of being served at the Drunkard’s Lap.
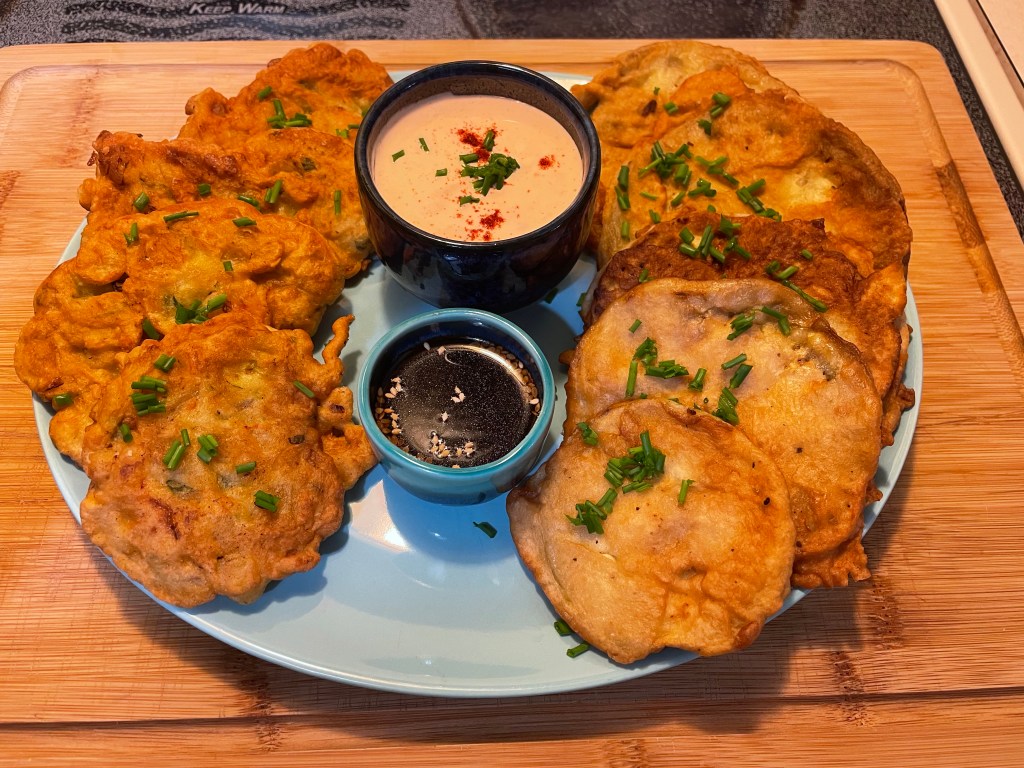
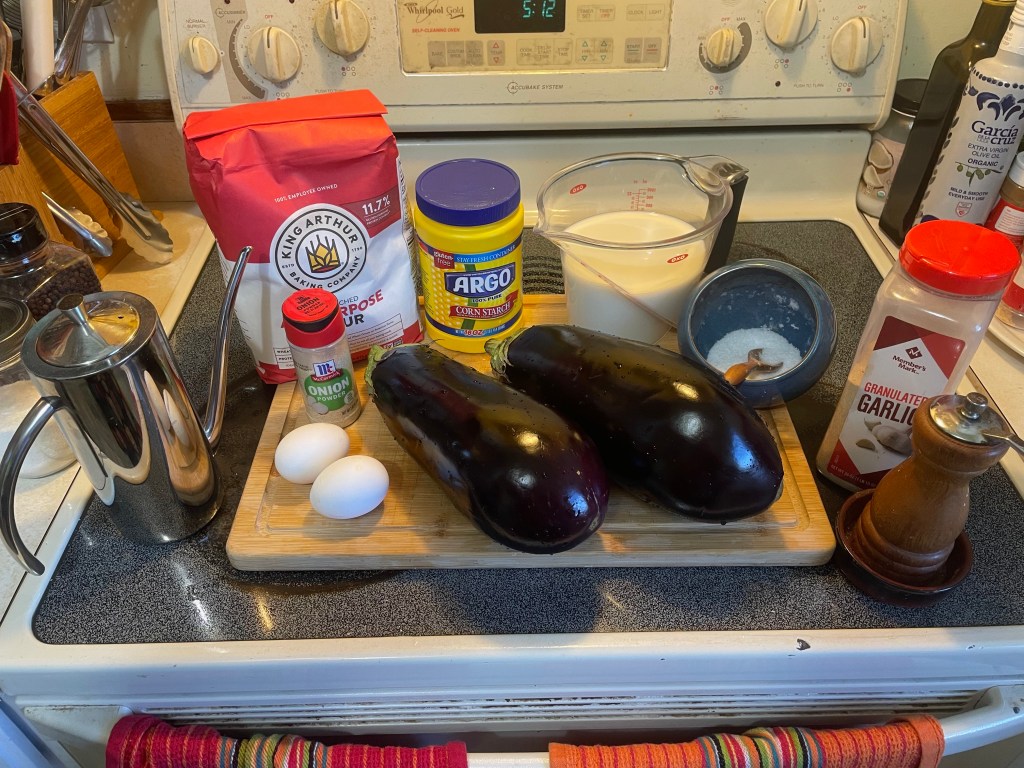
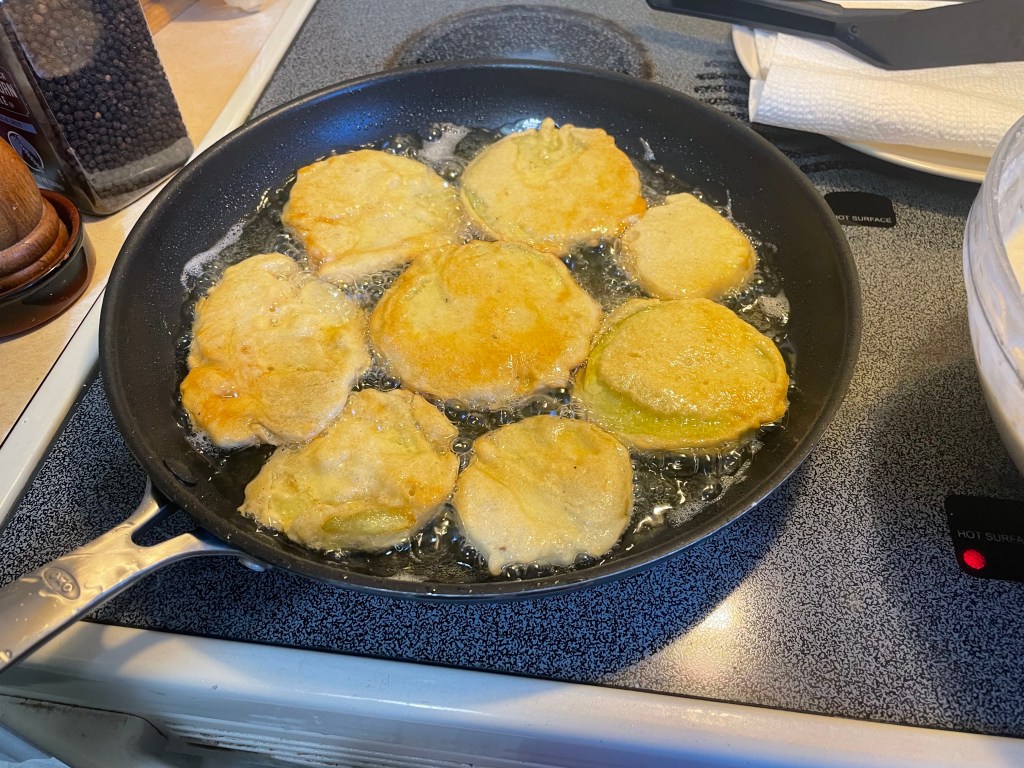
Eggplant fritters
This is, oddly enough, my Bean’s absolutely favorite food. In amongst the more typical kiddo favorites such as grilled cheese, mac and cheese, anything with cheese, ice-cream, pizza, and Nutella, there is, somehow and unaccountably, eggplant. But only in this form – golden-crisp on the outside, meltingly-soft on the inside. It is a greasy, addictive treat that the Bean formed a strong attachment to at a young age. This gives me hope that, even those who would not usually eat this rather challenging vegetable, will enjoy these fritters. And, if you truly cannot conquer your doubts about eggplant, switch out this ingredient for a different fry-friendly food. Thin slices of zucchini, sweet pepper, even leaves of zingy kimchi or tender filets of white fish can be dipped in this batter and tossed into hot oil. Remember: crispy-crunchy on the outside and juicy on the inside.
One large eggplant usually makes 25-30 fritters – can easily be scaled up or down based on the size and number of vegetables used.
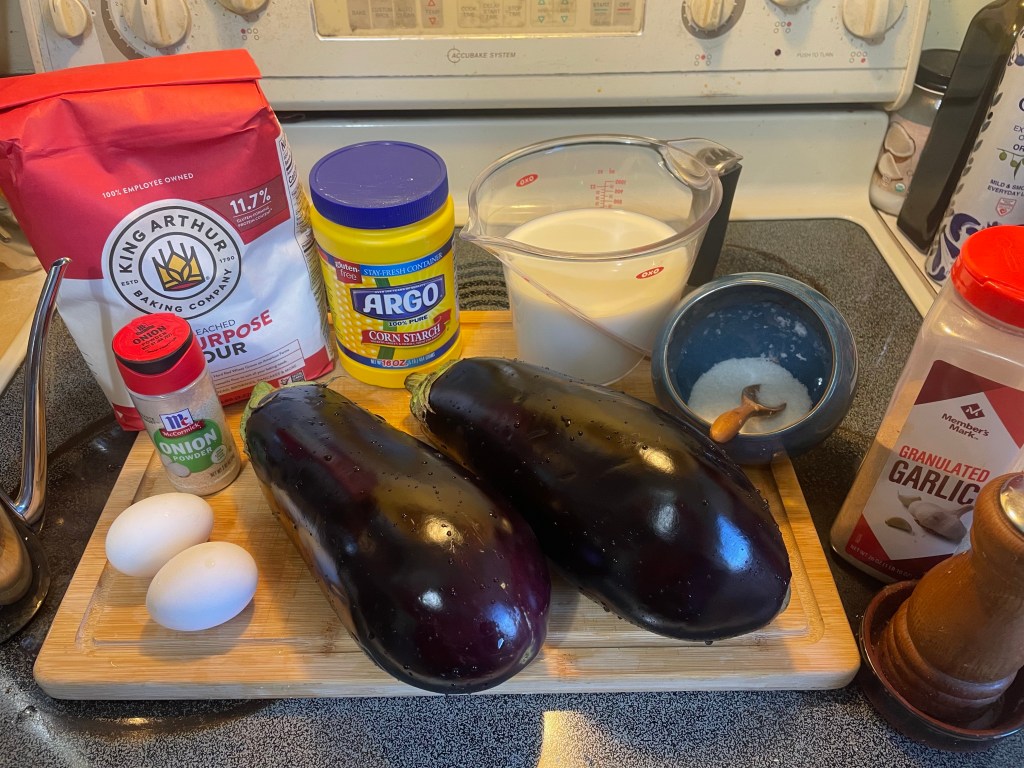
Ingredients:
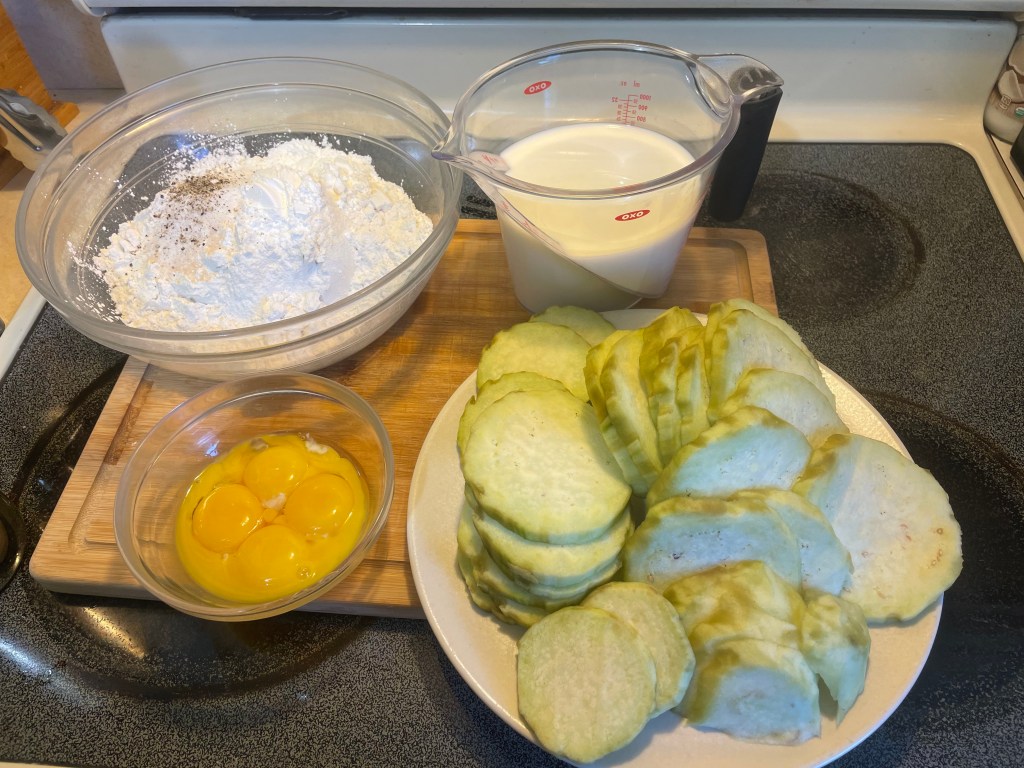
2 large eggplants, washed, peeled, and sliced into 0.5cm/1/4 inch rounds
360g/3 cups all purpose flour
30g/1/4 cup cornstarch
2 eggs, separated
750ml/3 cups milk
15g/3 tsp salt
5g/1tsp onion powder
5g/1tsp garlic powder
2.5g/1/2 tsp black pepper
Neutral oil for pan-frying
Method:
- Mix flour, cornstarch, salt, and spices together in a large bowl.
- Add the egg yolks, then add the milk a little at a time, as you mix briskly. The batter will start by coming together into a paste and then will become more loose and, finally turn into a thick liquid. Adding the liquid gradually makes it easier to create a smooth batter with no lumps.
- In a separate bowl, whisk the egg whites until stiff.
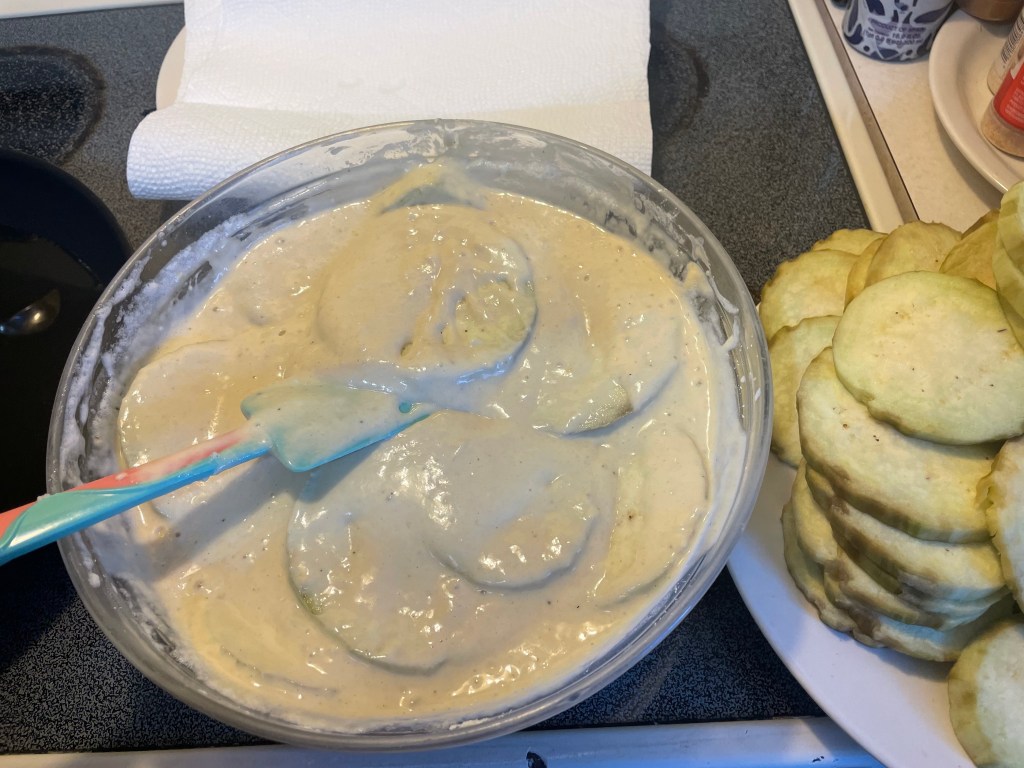
- Gently fold the whipped egg whites into the big bowl of batter.
- Introduce your eggplant slices into this mix, placing as many as will easily fit and be thoroughly coated in batter into the bowl. You can always add in more as you fry the battered slices.
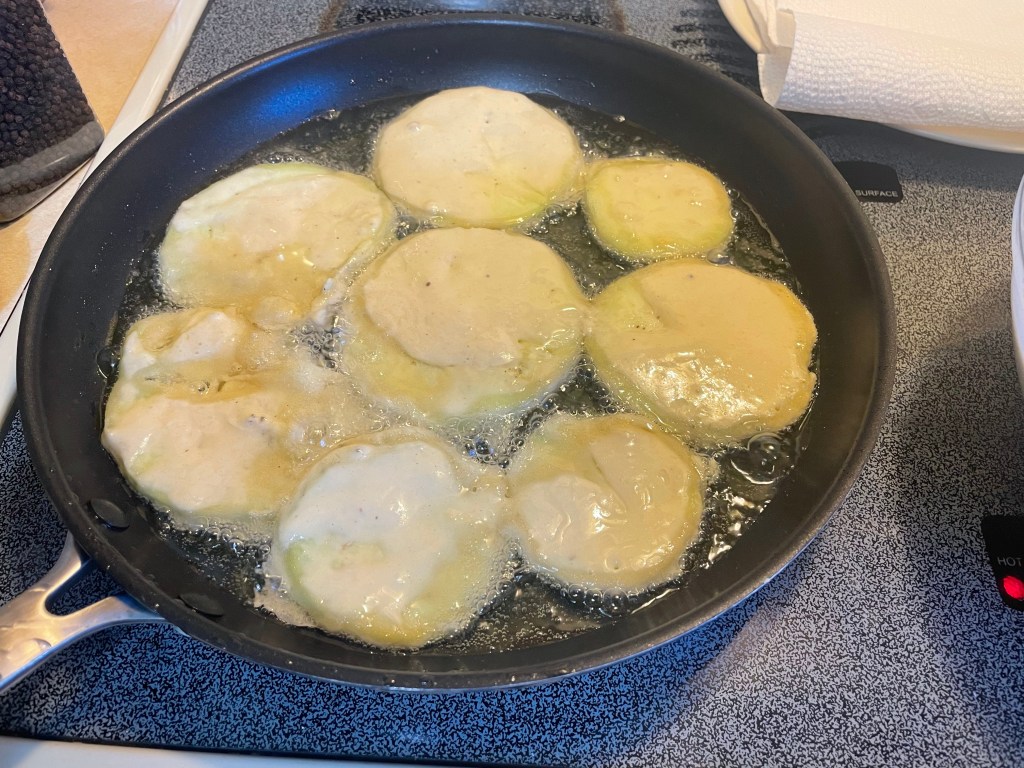
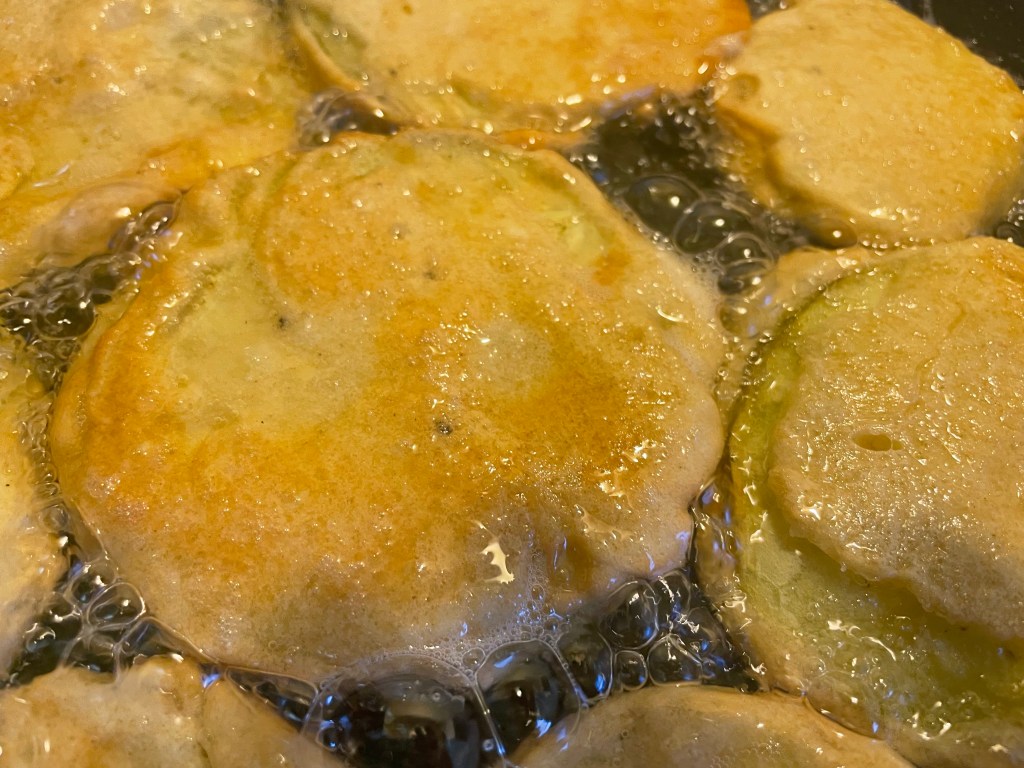
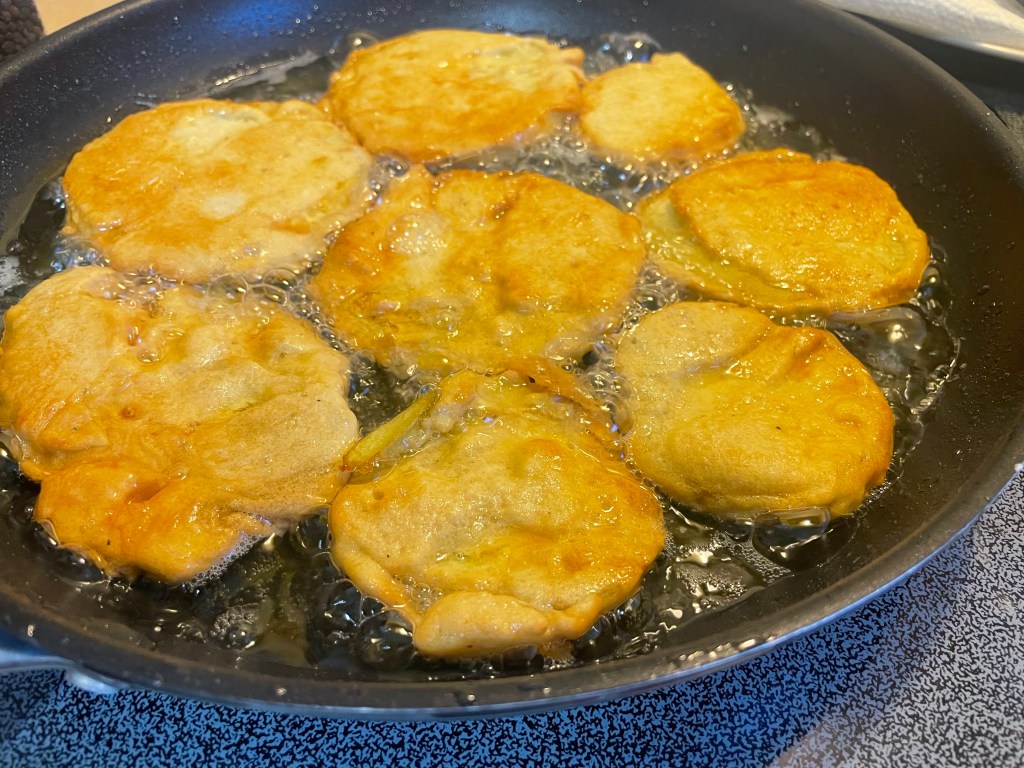
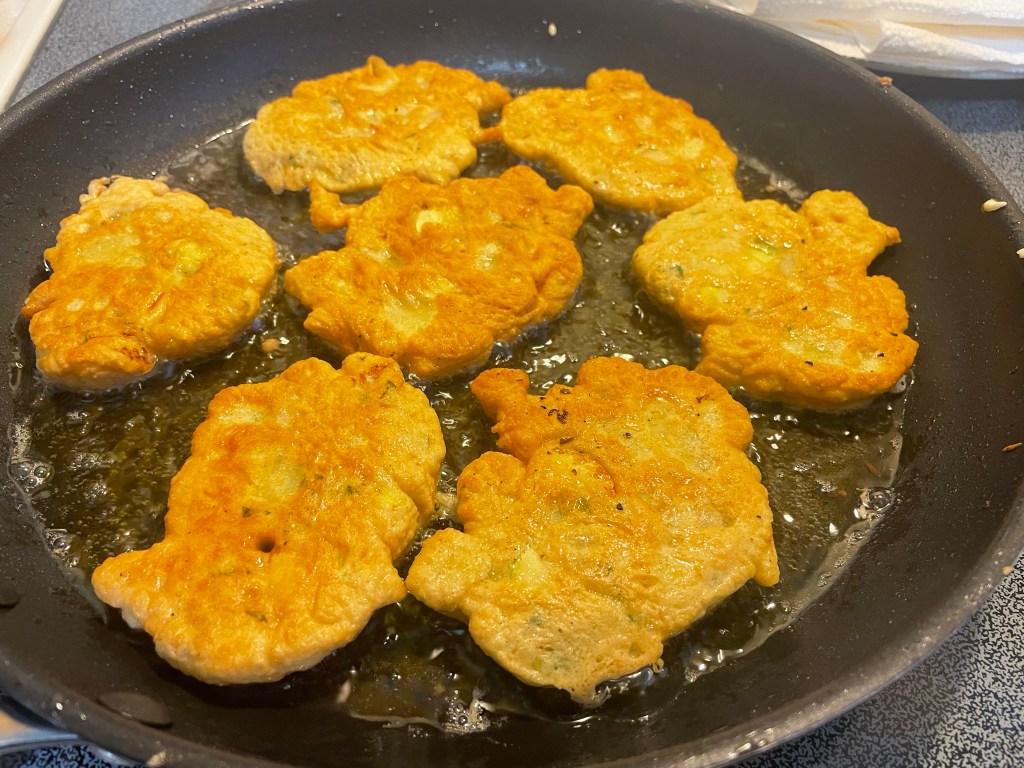
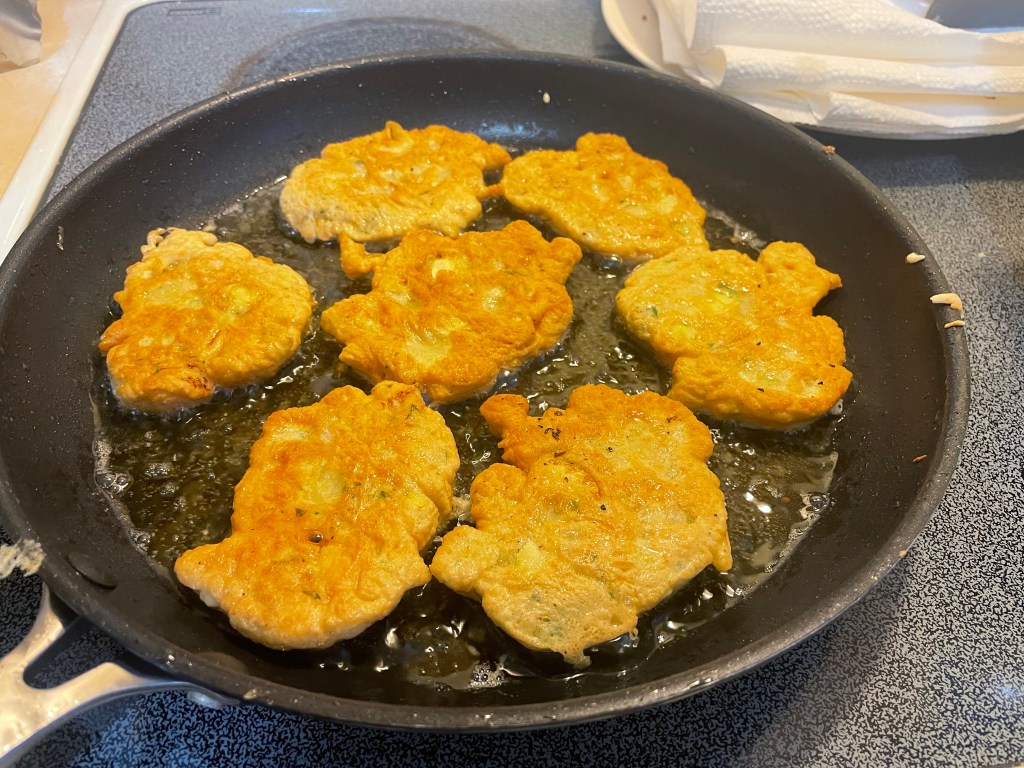
- In a large frying pan, add enough oil to create a good frying environment. Not deep enough for the fritters to swim in but more than just a sheen of grease coating the pan. Aim for a depth of 0.5cm/1/4 inch of oil. Heat until shimmering.
- Place as many batter-coated eggplant slices into the pan as will fit comfortably without crowding. This is definitely a fry-in-batches job. I usually have my favorite music or podcast playing, my preferred cold beverage close to hand, a station where I will drain the piping-hot, ready fritters of their excess grease nearby, and a casserole pan kept in a just-warm oven to transfer to cooked goodies to. Then I settle in for a peaceful frying session, interrupted only by ravenous family members continually popping by to steal the crispy fritters before they go in the oven and get in any way de-crisped. I have a wise family.
- Fry until golden brown on each side and fully cooked inside (depending on the strength of your heat source, about 2-3 minutes per side). Drain on a rack placed over a paper-towel-lined plate or baking sheet. If not eating immediately, place in a low oven (165F/75C) to keep warm.
Notes: These are at their most delectable fresh, fresh, fresh! I do not think that I can get away with using the word crisp one more time…
But they are also surprisingly good cold out of the fridge at ridiculously late hours of the night. Say, after a busy work-shift. And also quite acceptable when warmed through in a toaster oven the next day.

Shrimp and Vegetable Fritters

Makes 25-30 fritters, depending on how big your scoops are.
This is my favorite variation on the eggplant fritters above. The batter ingredients and mixing/frying method are essentially the same. The juicy shrimp plays very happily with the soap-freshness of the cilantro, the sweetness of the onion, and the hint of sunny curry powder. Beyond that must-have base combination, mix in other vegetables and spices as you like best. It is fun to vary the textures and flavors in these fritters.
Ingredients:
360g/3 cups all purpose flour
30g/1/4 cup cornstarch
2 eggs, separated
750ml/3 cups milk
15g/3tsp salt
5g/1tsp curry powder
5g/1tsp Kashmiri Chili powder
10g/2 tsp salt
500g/1lb raw shrimp, peeled, de-veined, and chopped into roughly 1-2cm/0.5-1inch pieces
1 medium yellow onion, peeled and finely chopped
1 small bunch cilantro/3-4tbsp, washed and finely chopped
1 jalapeño pepper, washed and finely chopped
Approximately 175g/1 cup chopped vegetables of your choice: sweet corn kernels, a mixture of chopped sweet peppers, and zucchini all work well
Neutral oil for pan-frying
Method:
- Mix flour, cornstarch, salt, and spices together in a large bowl.
- Add the egg yolks, then add the milk a little at a time, as you mix briskly. The batter will start by coming together into a paste and then will become more loose and, finally turn into a thick liquid. Adding the liquid gradually makes it easier to create a smooth batter with no lumps.
- In a separate bowl, whisk the egg whites until stiff.
- Mix the shrimp, vegetables, and herbs into the batter.
- Then gently fold the whipped egg whites into the big bowl of batter.
- In a large frying pan, add enough oil to create a good frying environment. Not deep enough for the fritters to swim in but more than just a sheen of grease coating the pan. Aim for a depth of 0.5cm/1/4 inch of oil. Heat until shimmering.
- Using a large spoon or ladle, scoop portions of batter into the pan. Place as many fritters into the pan as will fit comfortably without crowding. This is definitely a fry-in-batches job. I usually have my favorite music or podcast playing, my preferred cold beverage close to hand, a station where I will drain the piping-hot, ready fritters of their excess grease nearby, and a casserole pan kept in a just-warm oven to transfer to cooked goodies to. Then I settle in for a peaceful frying session, interrupted only by ravenous family members continually popping by to steal the crispy fritters before they go in the oven and get in any way de-crisped. I have a wise family.
- Fry until golden brown on each side and fully cooked inside (depending on the strength of your heat source, about 2-3 minutes per side). Drain on a rack placed over a paper-towel-lined plate or baking sheet. If not eating immediately, place in a low oven (165F/75C) to keep warm.
Notes: These are at their most delectable fresh, fresh, fresh! I do not think that I can get away with using the word crisp one more time…
But they are also surprisingly good cold out of the fridge at ridiculously late hours of the night. Say, after a busy work-shift. And also quite acceptable when warmed through in a toaster oven the next day.


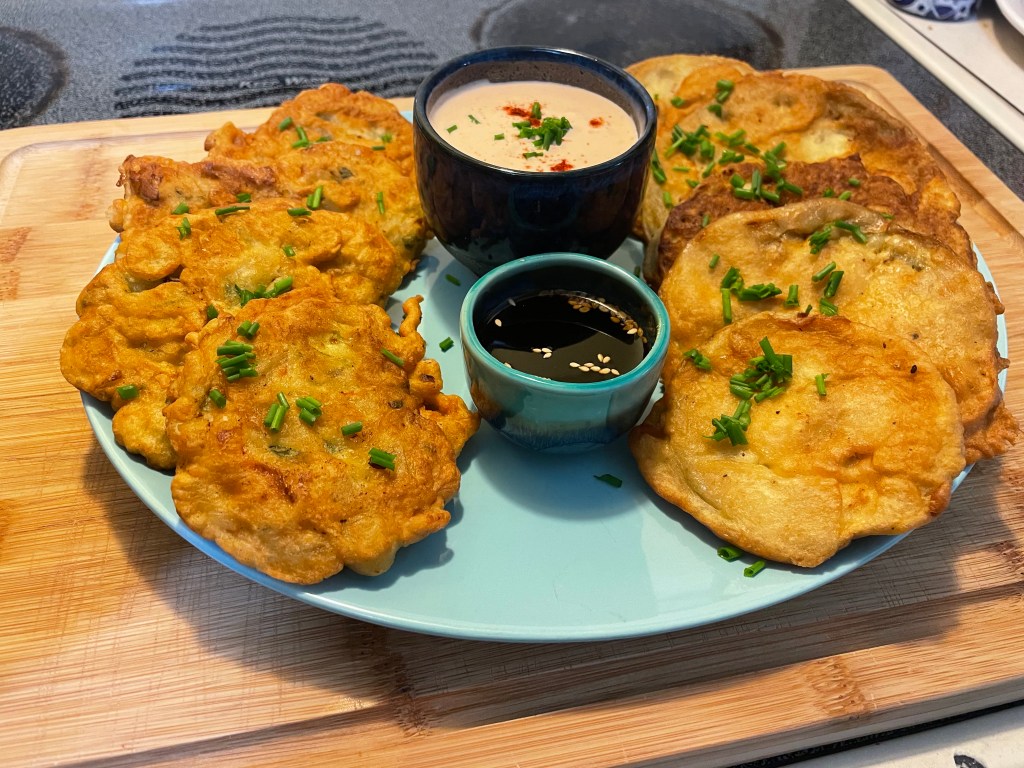
Serve either kind of fritter with your favorite dipping sauce(s). Something with a fresh pop of acid to cut the richness of your fried treat is good. Something that brings additional complexity to the meal and balances sweet, spicy, and salty flavors. Here are two sauces that I like:
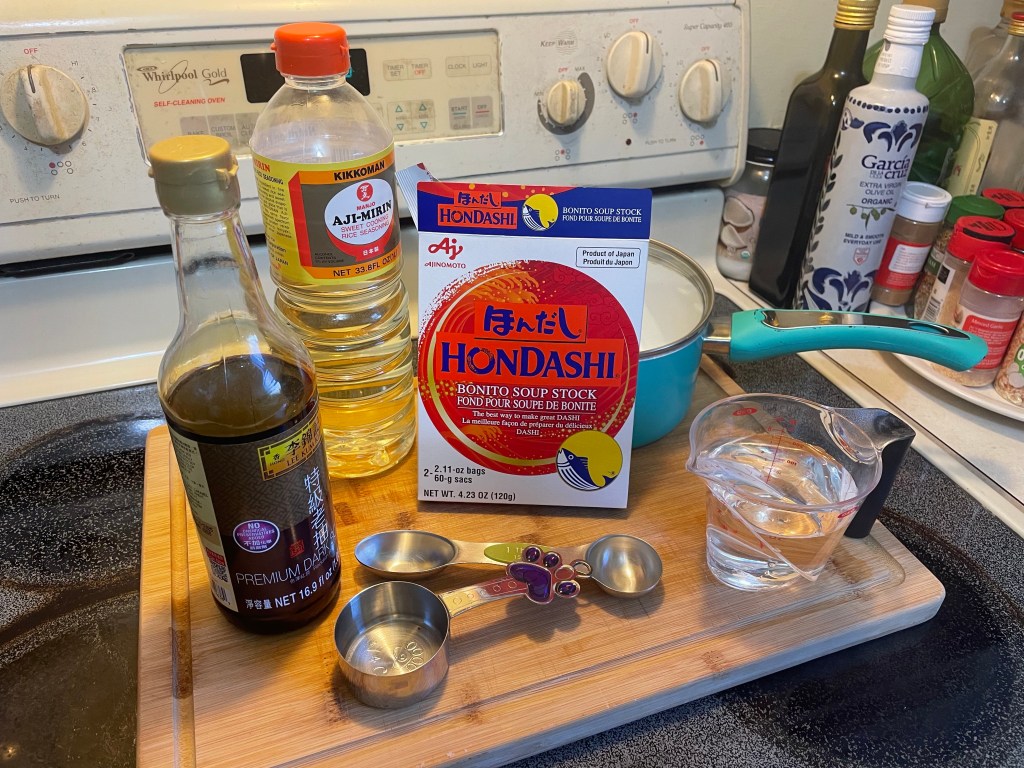
Tempura Dipping Sauce
Makes approximately 1 cup.
This slightly sweet and salty sauce is very light with smoky, umami notes from the dashi base. The original recipe is from allrecipes.com (submitted by Crimson667) but I like to add a little floral heat from grated ginger and some nutty texture from sesame seeds too.
Ingredients:
250ml/1 cup water
15g/1tbsp dashi granules
60ml/1/4 cup mirin
30ml/2tbsp soy sauce
5g/1tsp freshly grated ginger
10g/2tsp toasted sesame seeds
Method:
- In a small saucepan, bring the water to a boil. Stir in the dashi granules until fully dissolved. Lower the heat and allow to simmer for 1-2 minutes.
- Remove the pan from the heat and stir in the mirin, soy sauce, ginger, and sesame seeds. Allow to cool before serving.
Creamy Garlic Dipping Sauce
Makes approximately 1.5 cups.
This sauce is a little more rich but the tangy yogurt base, spicy sweetness of the chili ketchup, and the smokiness from the paprika really complement the garlic flavor. And the whole mix works particularly well with shrimp fritters.
Ingredients:
250ml/1 cup whole milk Greek yogurt
60ml/1/4 cup mayonnaise
30ml/2tbsp sweet chili sauce
30ml/2tbsp spicy banana ketchup
5ml/1tsp fish sauce
3 cloves of garlic, peeled and finely minced
2.5g/1/2 tsp onion powder
5g/1tsp smoked paprika
Salt and pepper to taste
Method:
- Combine all ingredients in a small bowl and refrigerate until ready to serve. This can be eaten right away but the garlic flavor gets stronger (i.e. better) if it sits for at least one hour.


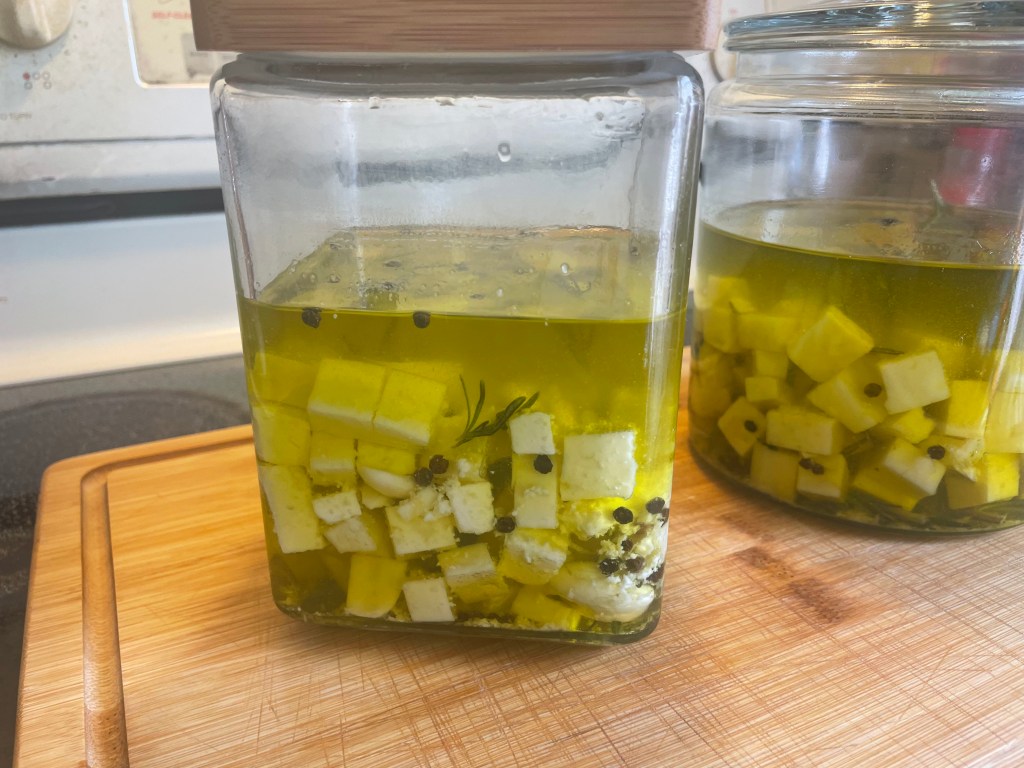
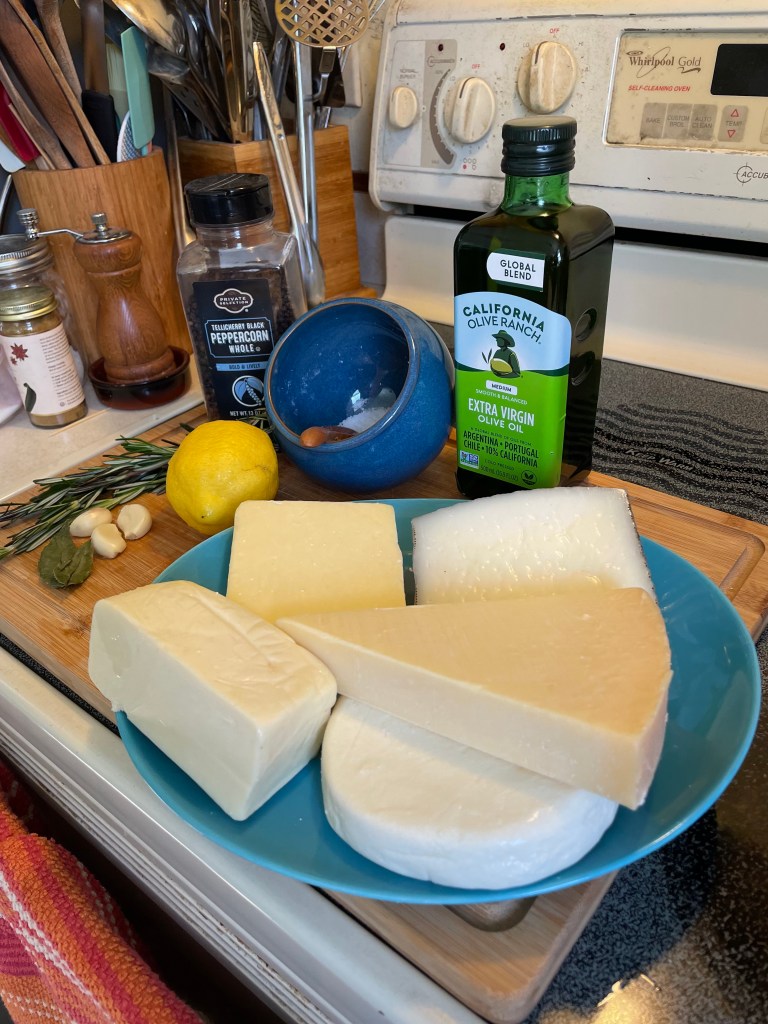
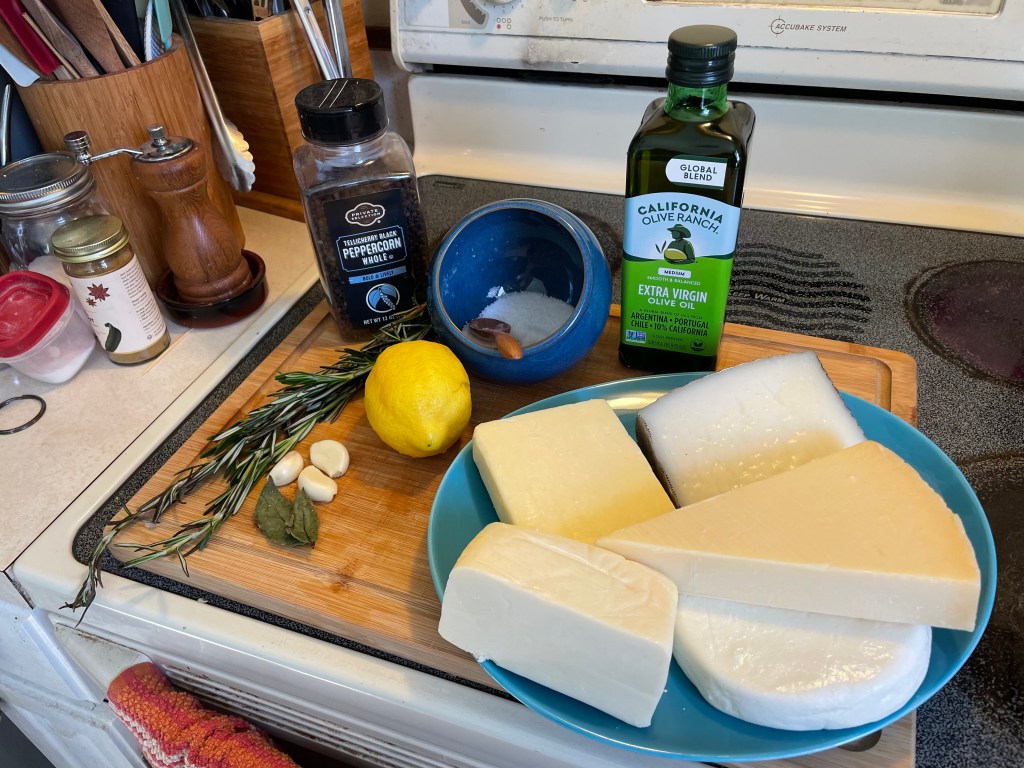
Marinated Cheese Tapas
Serves 4-6 as an appetizer.
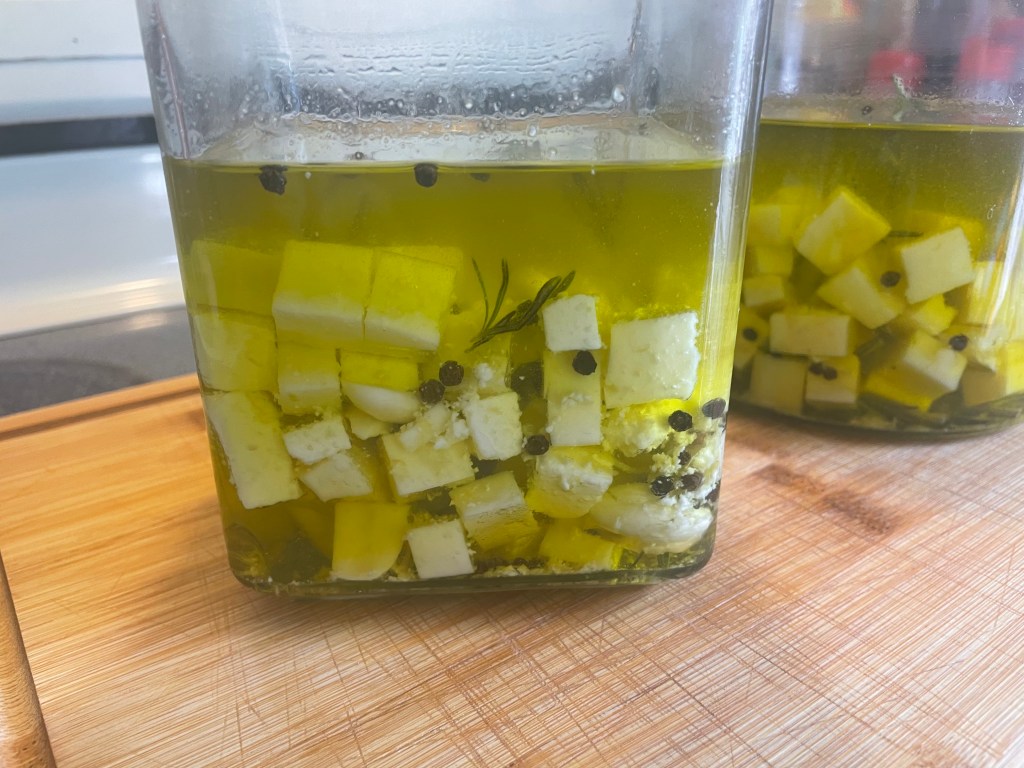
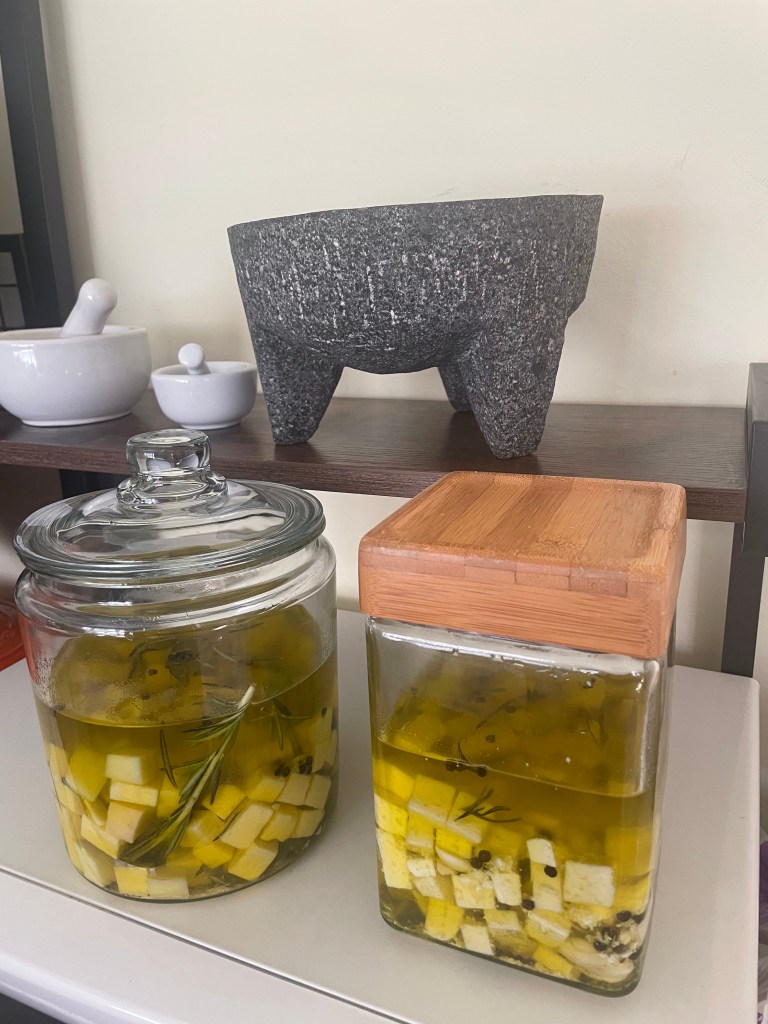
This is another recipe from José Andres’ Tapas: A Taste of Spain in America. His dish calls for Idiazabal cheese but, should this prove difficult to find, suggests substituting Manchego. I liked this so much the first time that I tried it that I have been making it with any number of firm, creamy, and crumbly cheeses ever since (all in the noble cause of culinary experimentation, of course!). I also like adding a little grated orange or lemon peel to the marinating oil.
Lately I have been making this to use up/ extend the life of/ add excitement to any bits and ends of firm cheeses that accumulate in my fridge. The only exceptions would be smoked cheeses because I am not sure if that strong flavor would work with this marinate. And of course, blue cheeses and soft cheeses. Not only because those would be difficult to cut and may just ooze and dissolve into the oil, but because we never seem to have any problems with left-overs with those particular kinds of dairy ;).
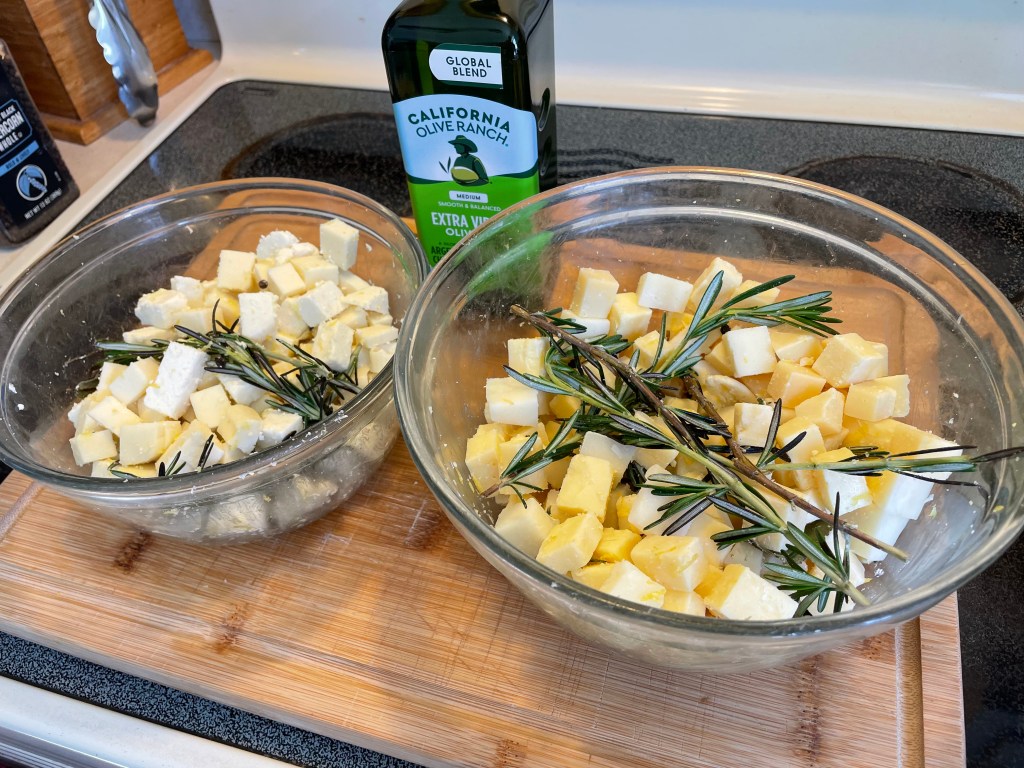
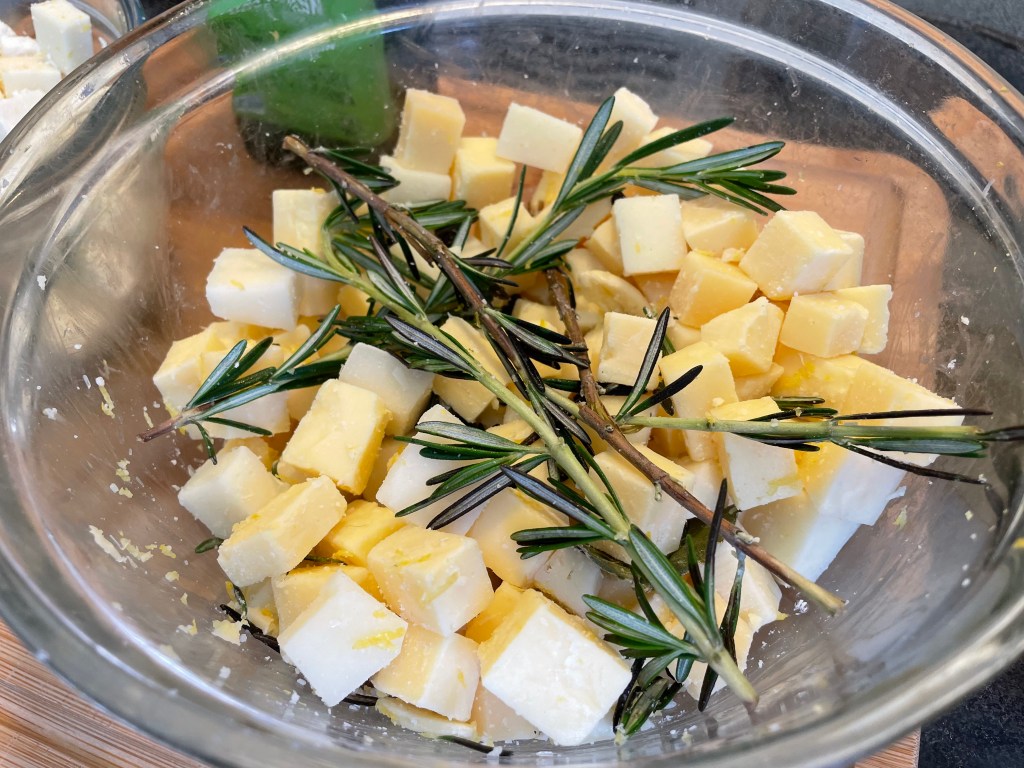
For aesthetic reasons, I recommend separating the more dry and crumbly cheeses like Manchego, aged Cheddar, and Parmesan from the less firm cheeses like Mozzarella and Queso Fresco. The latter two make a lovely tapas but they are right on the border of being too delicate to use in this preparation. And so their oil dunk gets a little cloudier. The firmer cheeses keep their nice sharp edges and look very impressive in their fragrant golden-green oil bath. It’s like regular resin dice versus precision edge dice ;).
Ingredients:
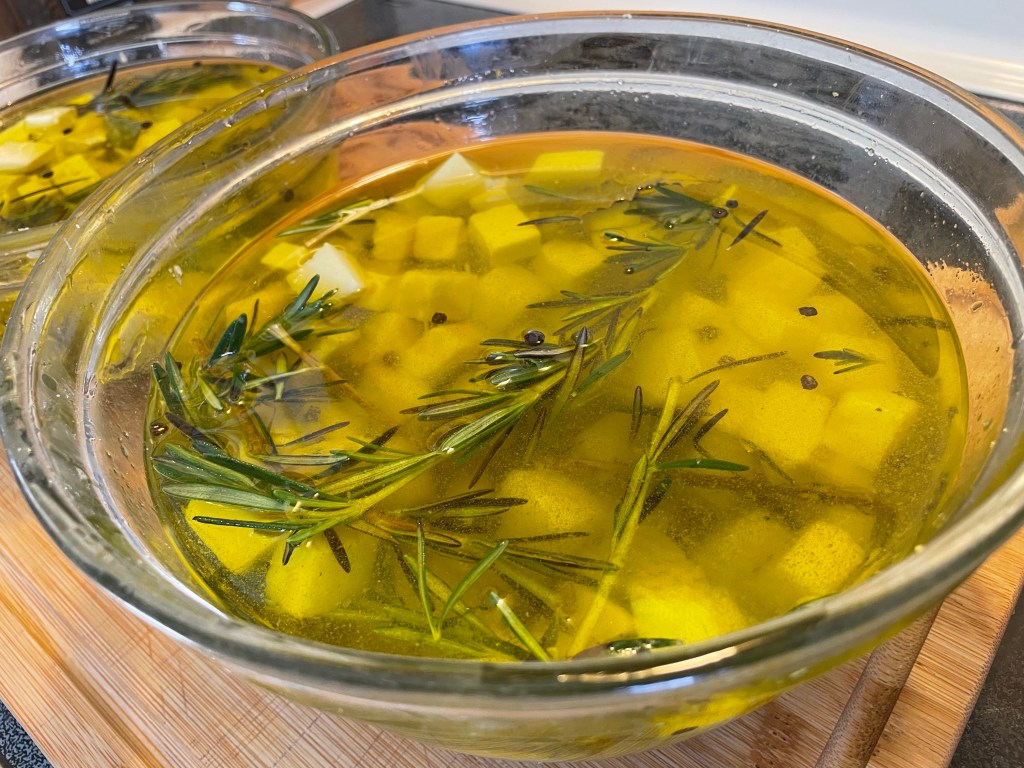
500g/1lb Manchego cheese (or other cheeses of your choice), cut into roughly 2cm/1 inch cubes
3 cloves of garlic, crushed but left whole
3 sprigs fresh rosemary
1 sprig fresh thyme
1 bay leaf
5g/1tsp freshly grated orange or lemon peel
15g/1tbsp whole black peppercorns
5g/1tsp sea salt
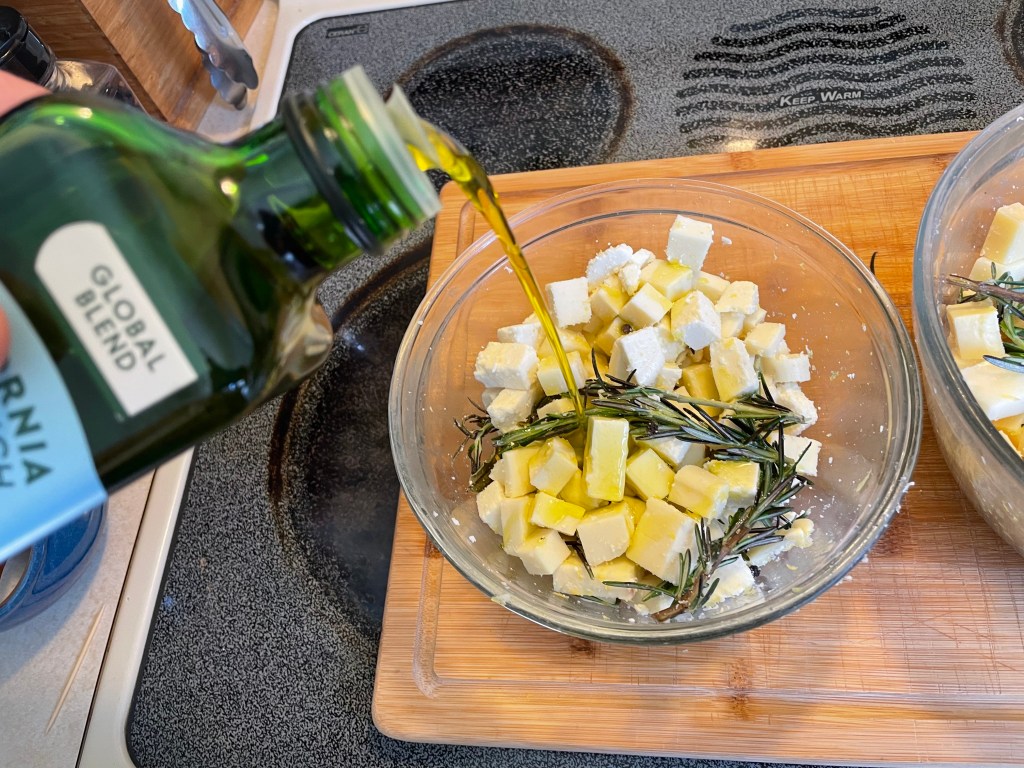
Extra virgin olive oil
Method:
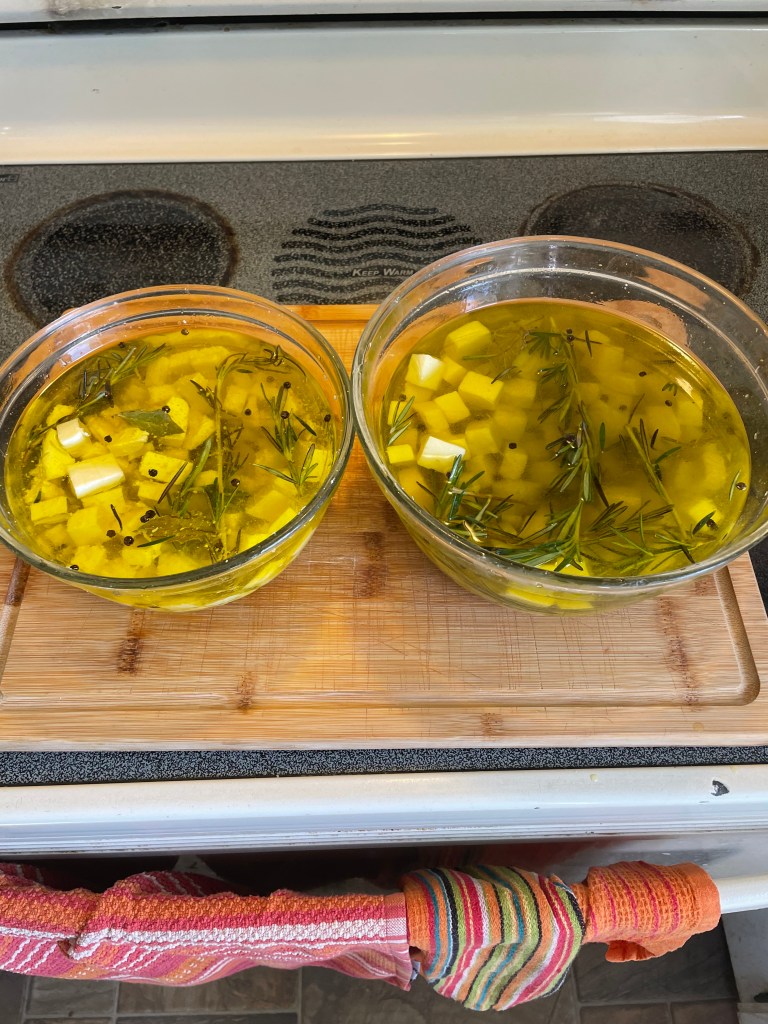
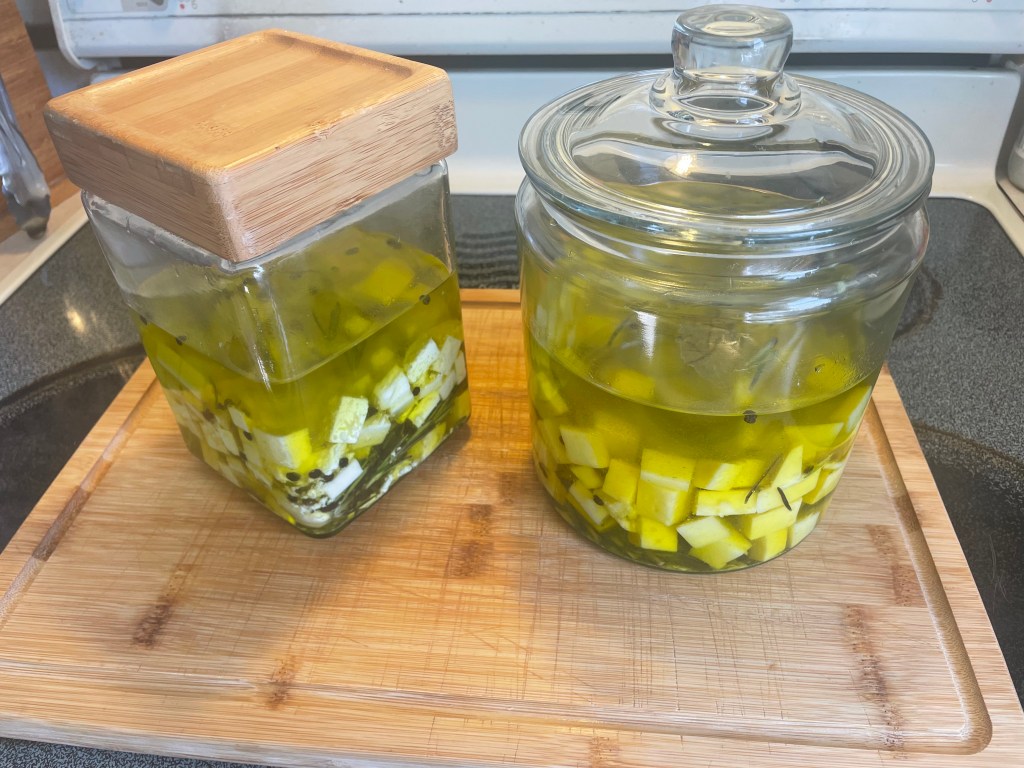
- Place the cheese, garlic, herbs, peel, and peppercorns into a bowl of wide-mouthed jar.
- Pour enough olive oil over the ingredients in the bowl to completely submerge them.
- Cover and allow to marinate for at least 6 hours at room temperature. When ready to eat, remove the cheese cubes from the fragrant oil and serve as part of a tapas spread.
- The cheese can also be stored in the fridge where it will keep very nicely for a week or longer. Remove from the fridge and allow to come to room temperature before serving.
- The oil is very tasty when used as a base for a vinaigrette or simply drizzled over roasted vegetables.


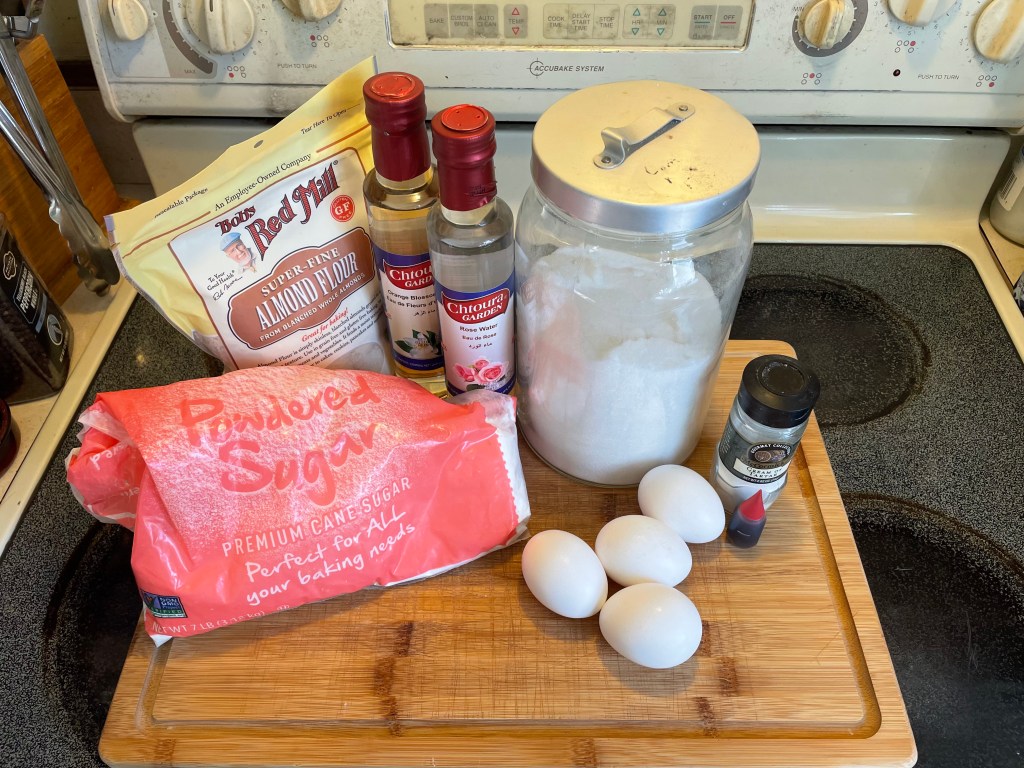
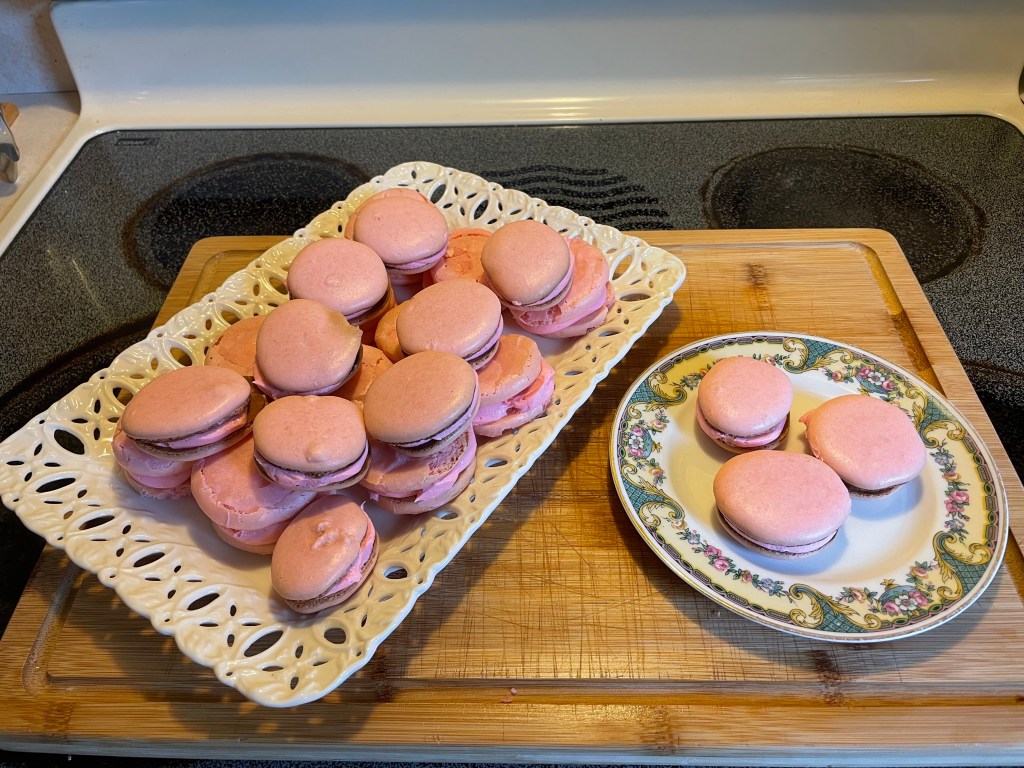
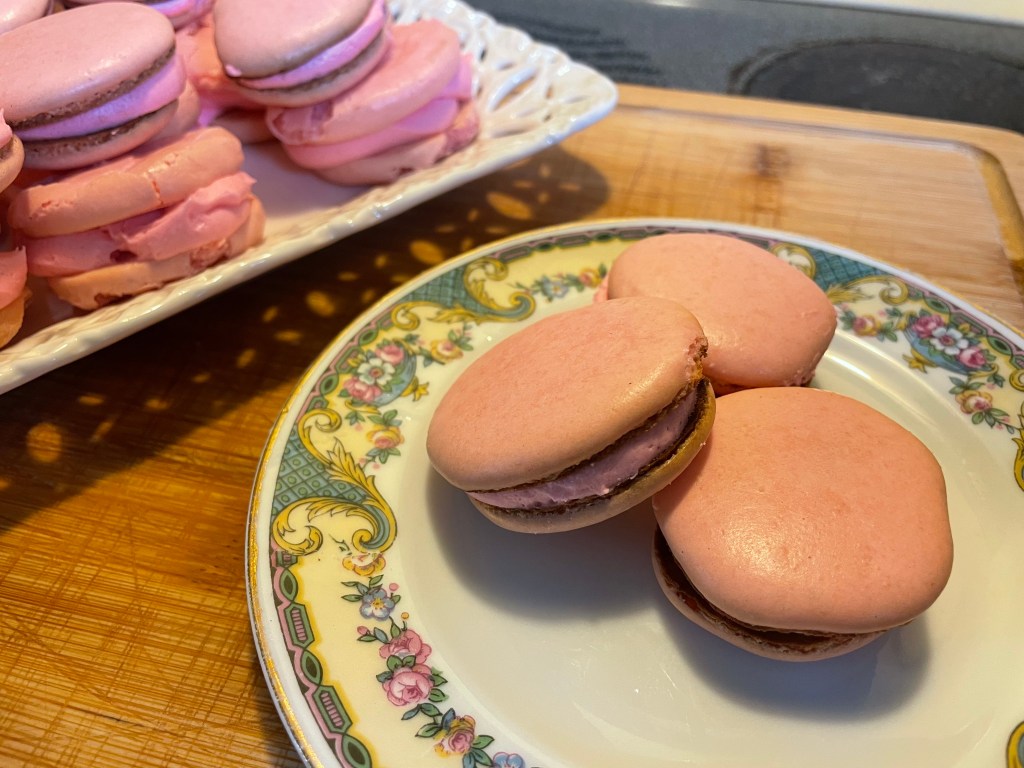
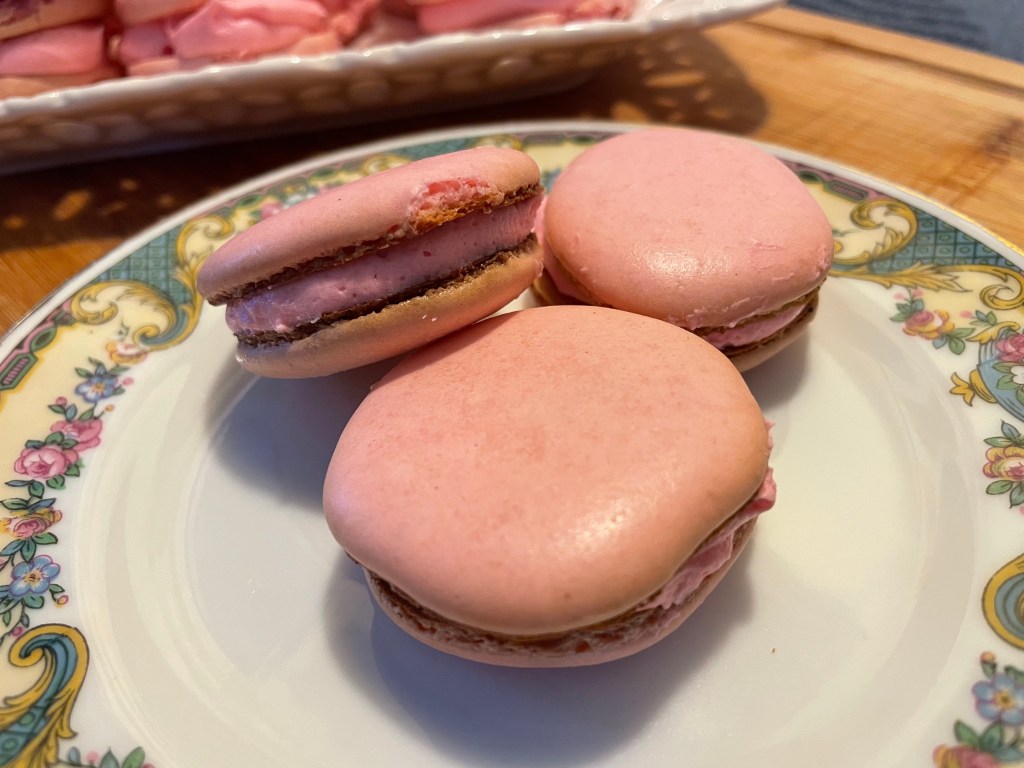
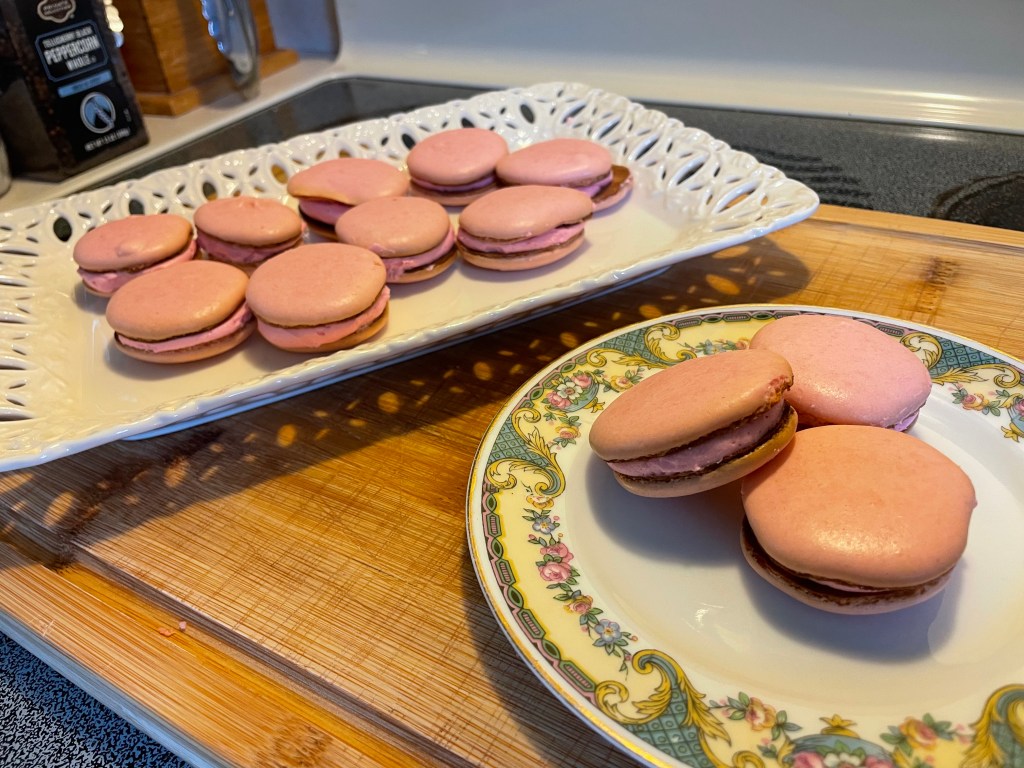
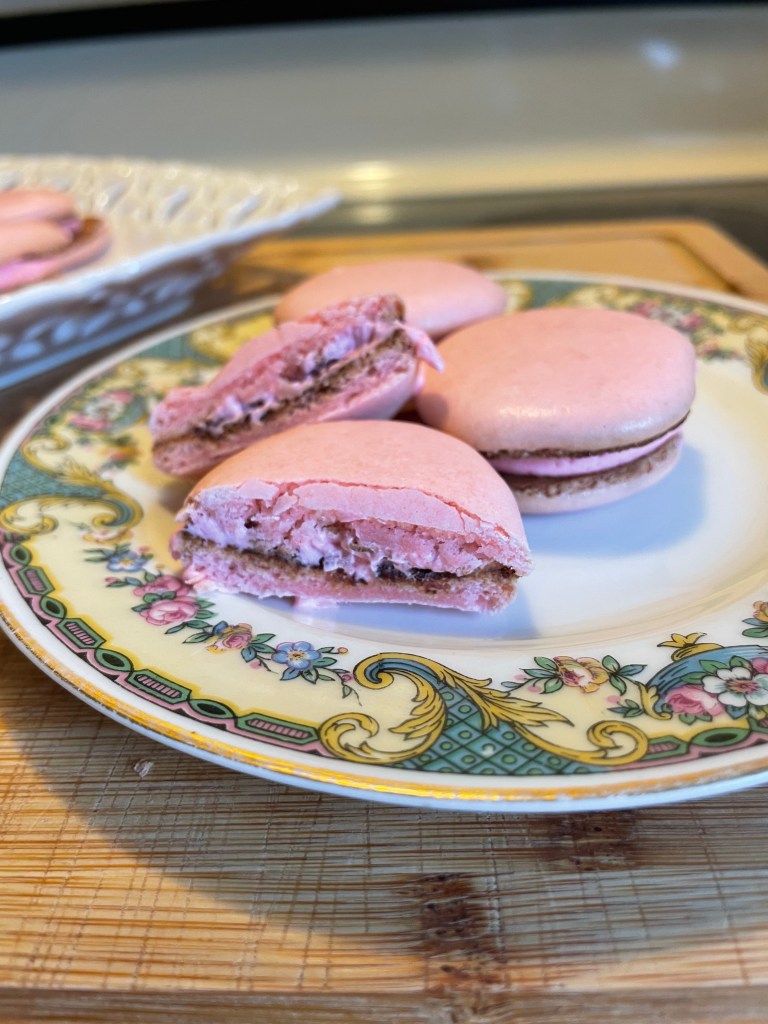
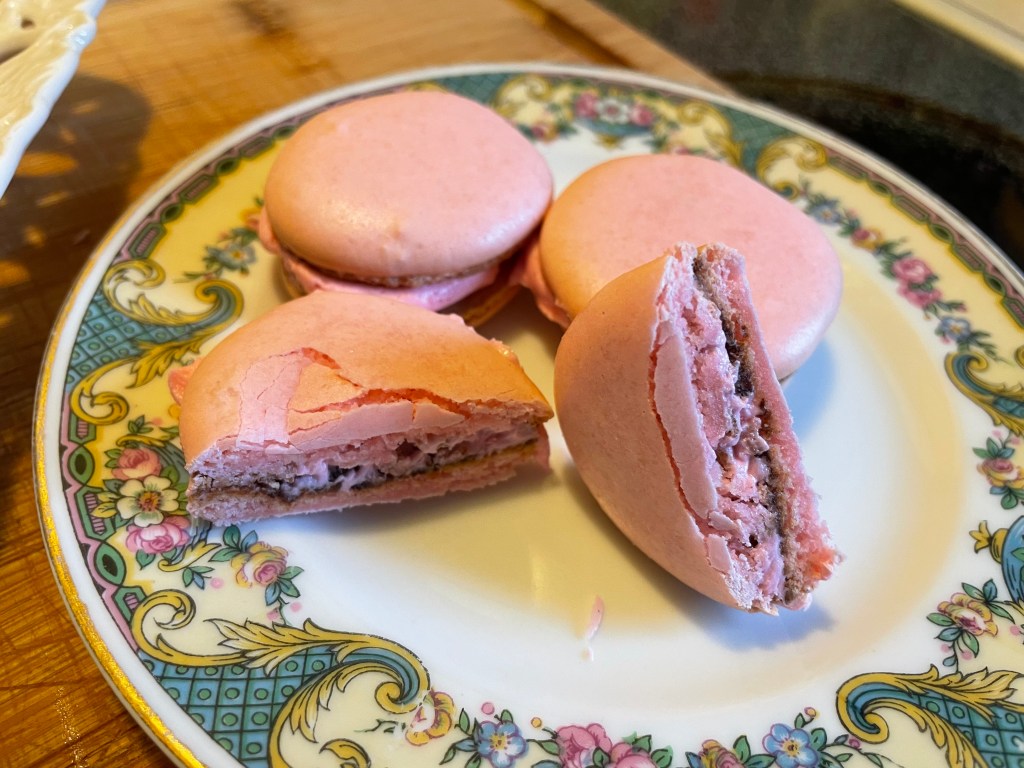
Macarons

Makes 40 shells, 20 sandwiched cookies.
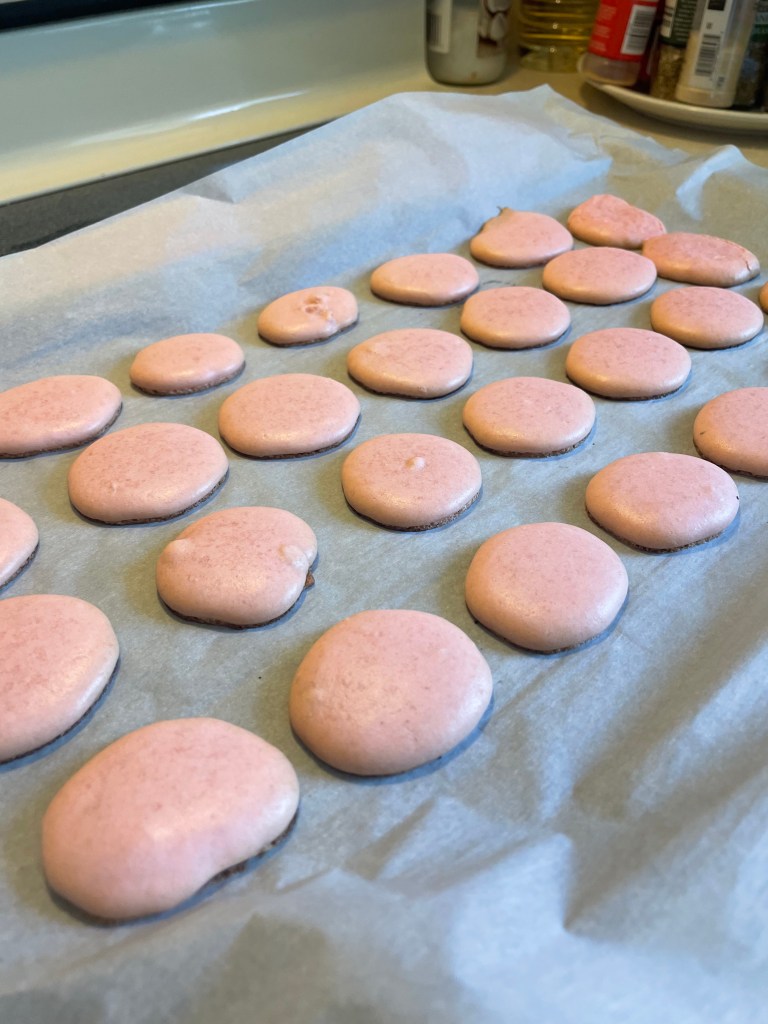
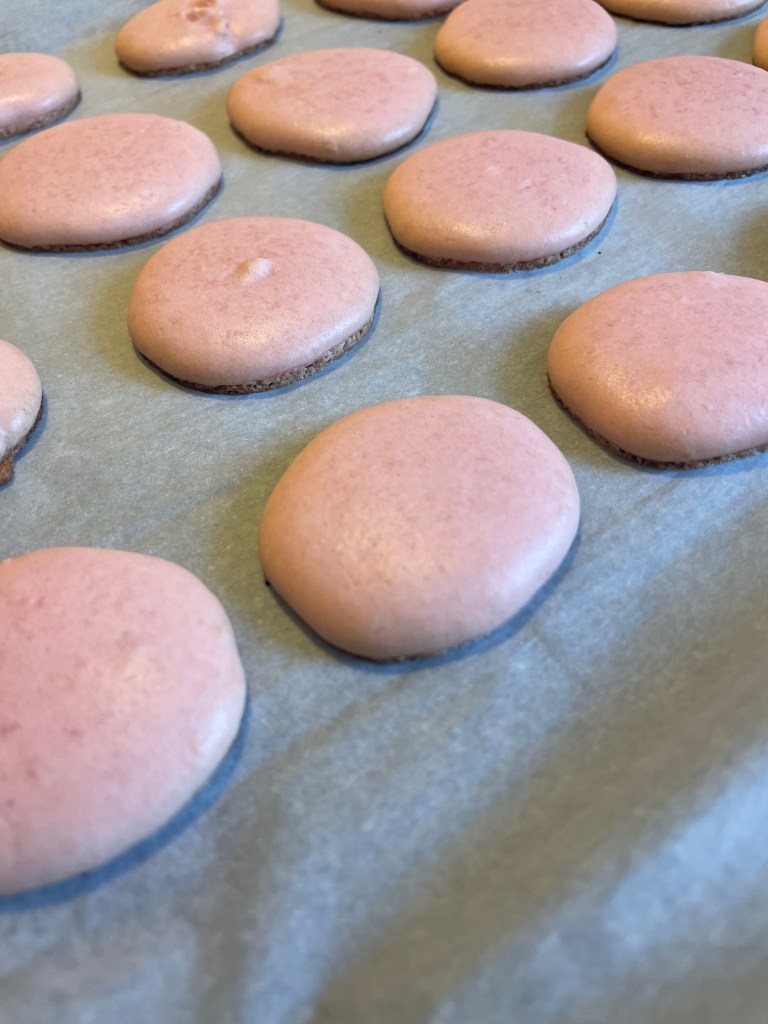
Even after a delectable evening feast at the Drunkard’s Lap and despite the distractions – pleasant, intimidating or distressing, depending on individual perspective – that are Mirt, the peacock feather coat-clad roguish fellow spectator, and the overwhelming musical drama of the Fall of Tiamat, Elodie and Eliana both find the rose and lychee macarons served by Fodder to be one of the most memorable parts of this evening. This is because our characters have good taste. And macarons are delightful.
Of course, macarons have the reputation of being technically challenging little confections. I suppose that means that I will culinarily level up if this attempt works out! I followed the helpfully detailed instructions on Sally McKenney’s sallysbakingaddiction.com: Beginner’s Guide to French Macarons with nervous exactitude.
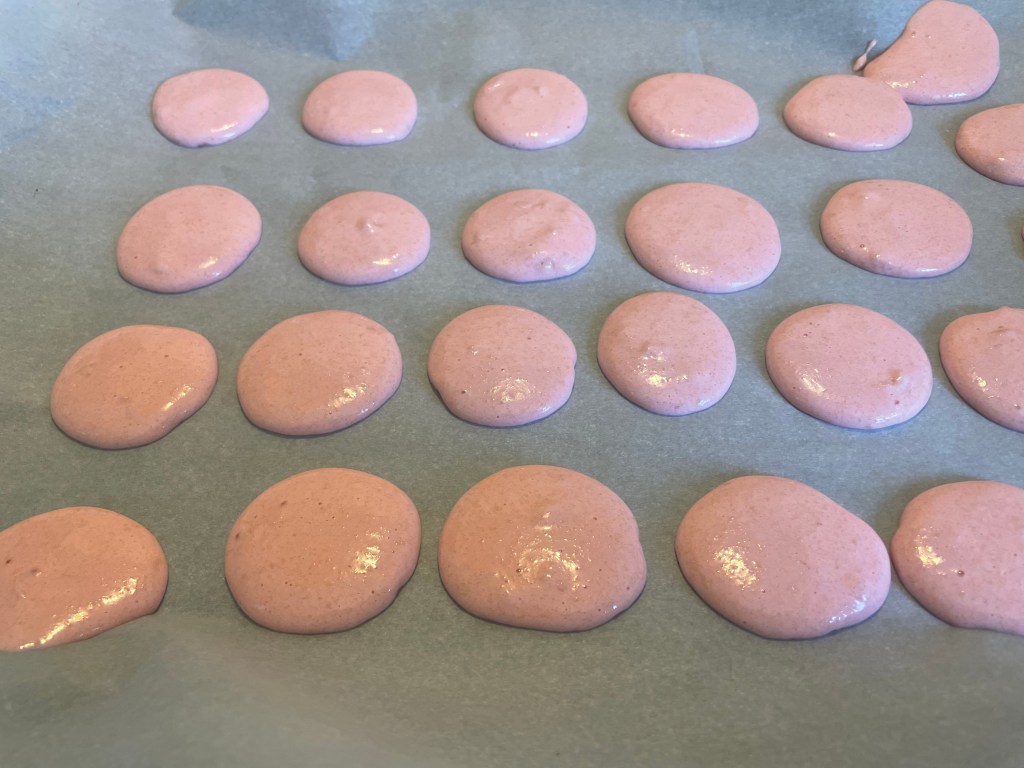
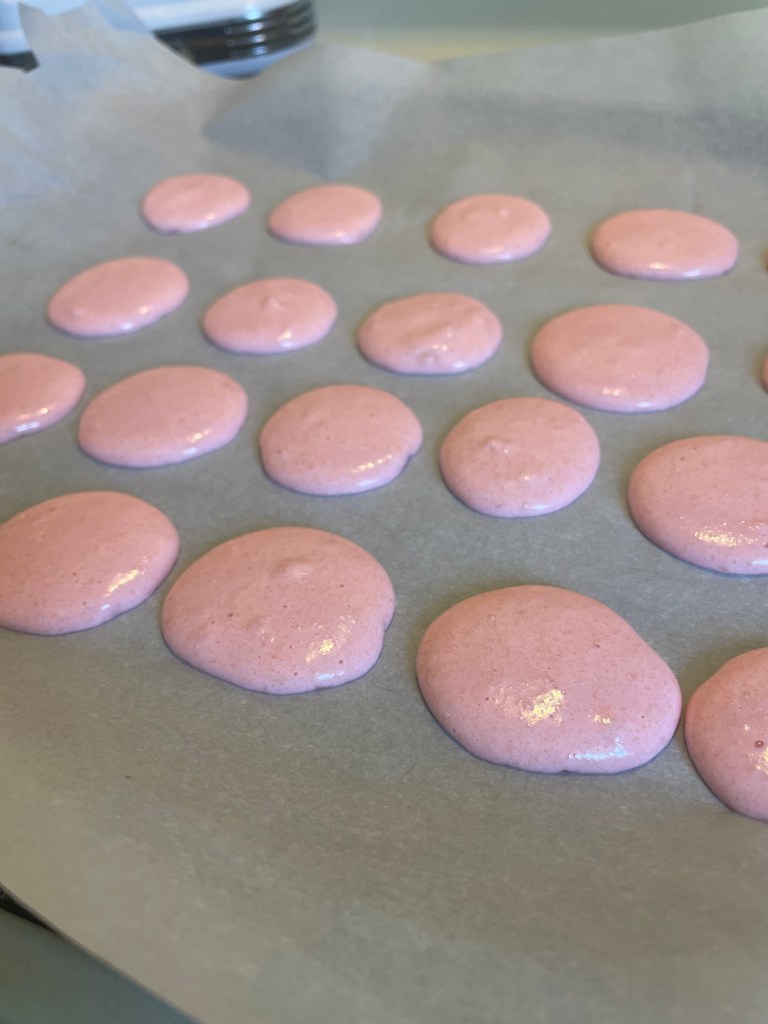
Next time I will use an actual piping bag and tip, and a stencil so that my circle shapes are more even for sandwiching with filling later. I will leave more space between cookies: some of mine ran together. I will also cut the baking time by a minute or so. While I was immensely proud of the tiny feet on my macarons, they were overly brown. I over-baked these little beauties. Or rather, I overbaked one tray of macarons. My oven is terribly inconsistent. I put two baking sheets in as close to center of the oven as I could. I also turned the sheets and rotated which shelves they were on halfway through the bake. It was already too late: one tray of macarons had grown nicely with beautifully smooth tops and adorable little feet. And the other had cookies that spread out and cracked all over. Even half-way through the baking time their fate was already set. And then, when I rotated the baking sheets, the pretty ones ended up scorching on the bottom. But not the cracked, misshapen ones. Those were well-baked. Ah well…Final note: get a new oven.
For my first attempt: not bad. Crisp crust, chewy cloud-like interior, fragrant with rose. Thank you very much to Sally McKenney for her excellent tutorial!
Try these for yourself. Even if the texture is not quite Parisian perfection, they are delicious!
Ingredients:
100g/between 3 and 4 large egg whites
1g/1/4tsp cream of tartar
2.5g/1/2tsp optional flavor extract (I used rose)
80g/1/3 cup superfine sugar (caster sugar – can be made by pulsing regular granulated sugar in a food processor 10-15 times)
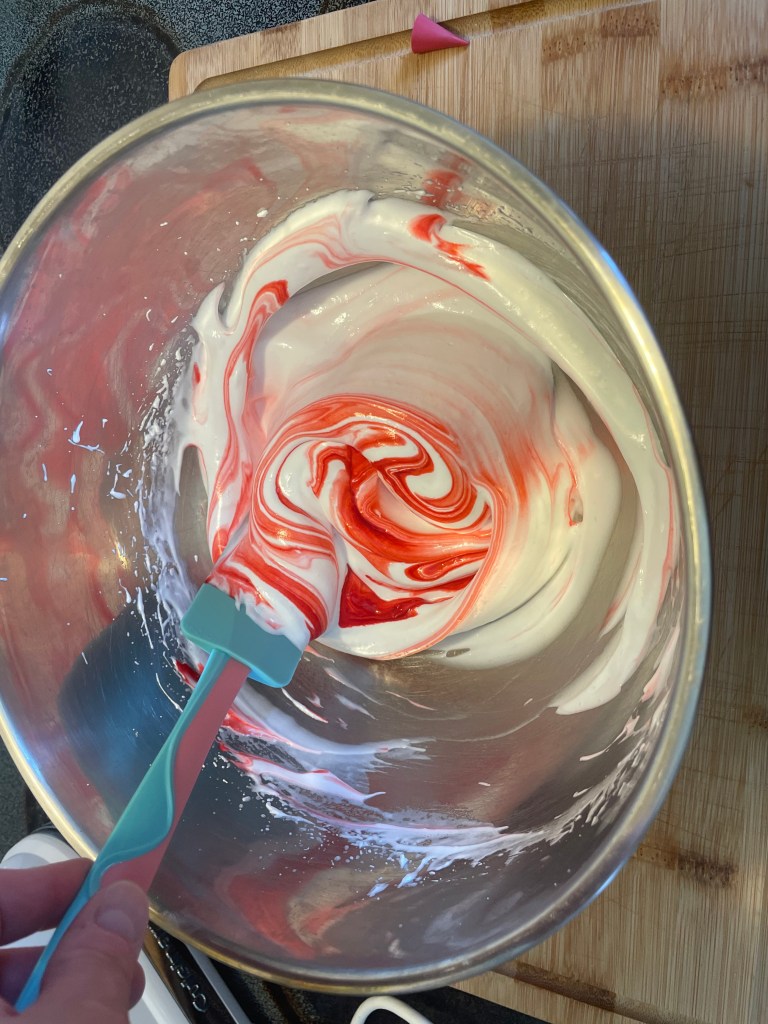
1-2 drops optional gel food coloring (I only had the standard liquid food coloring and added enough red to make a light pink meringue mix)
125g/1/2 cup almond flour
125g/1/2 cup confectioner’s sugar
Macaron filling (see below)
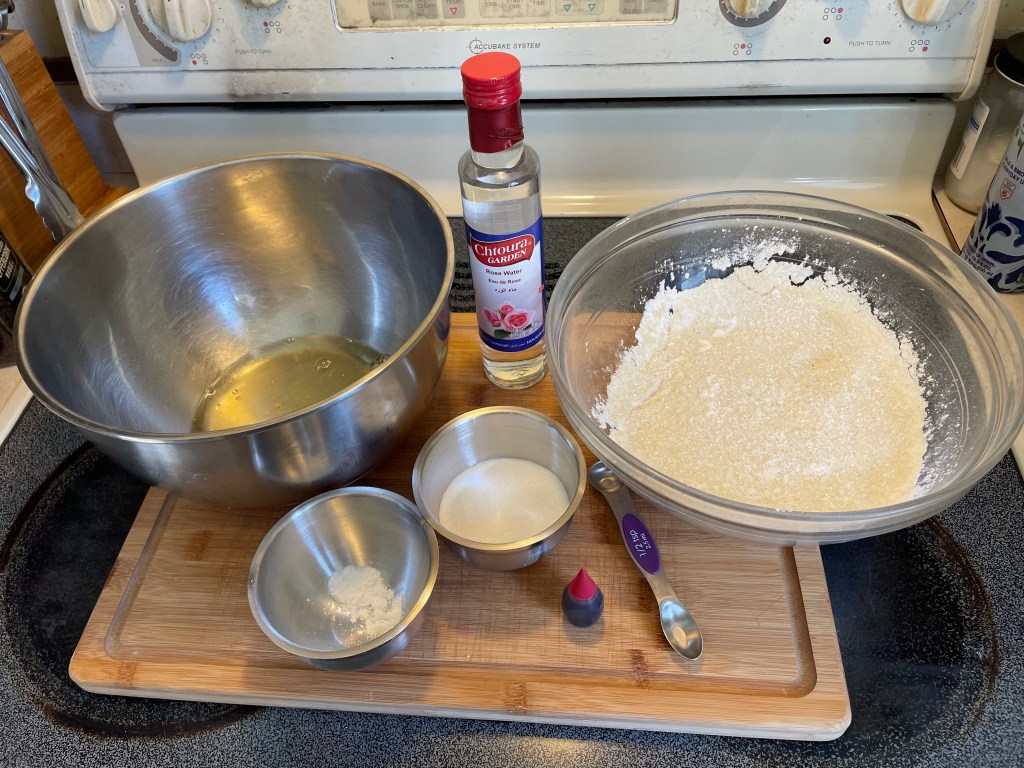
Method:
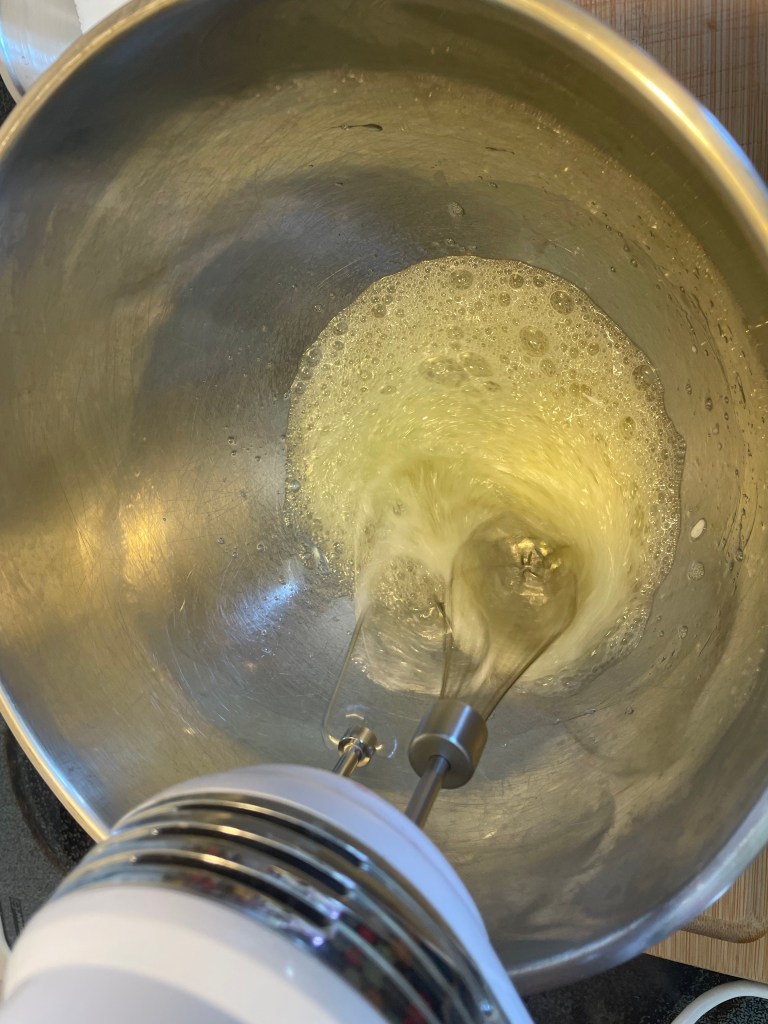
It is easier to separate egg whites from yolks when the eggs are cold. Measure out 100g of egg whites into a spotlessly clean, large glass or metal bowl. You can pre-wipe the bowl with lemon juice or vinegar – this acidic coating will help the egg whites whip up well. Cover the bowl of egg whites and refrigerate for 24 hours. This aging is said to improve your chances of getting the whites to whip up properly. After 24 hours, remove the bowl from the fridge and allow to come to room temperature. Cold egg whites do not whip up as well. I think the message here is clear: egg whites are fussy beings. Yolks are much more forgiving: save them to make custard or lemon curd. Or cook them up to mix with your doggie’s food as a little treat. I mean, how do you say no to this handsome pooch-face?


- Line 2 large baking sheets with parchment paper. Set aside
- Add cream of tartar and flavor extract (if using) to the egg whites in your bowl. Whisk using a stand mixer or handheld mixer. Start on medium speed and keep going until soft peaks form.
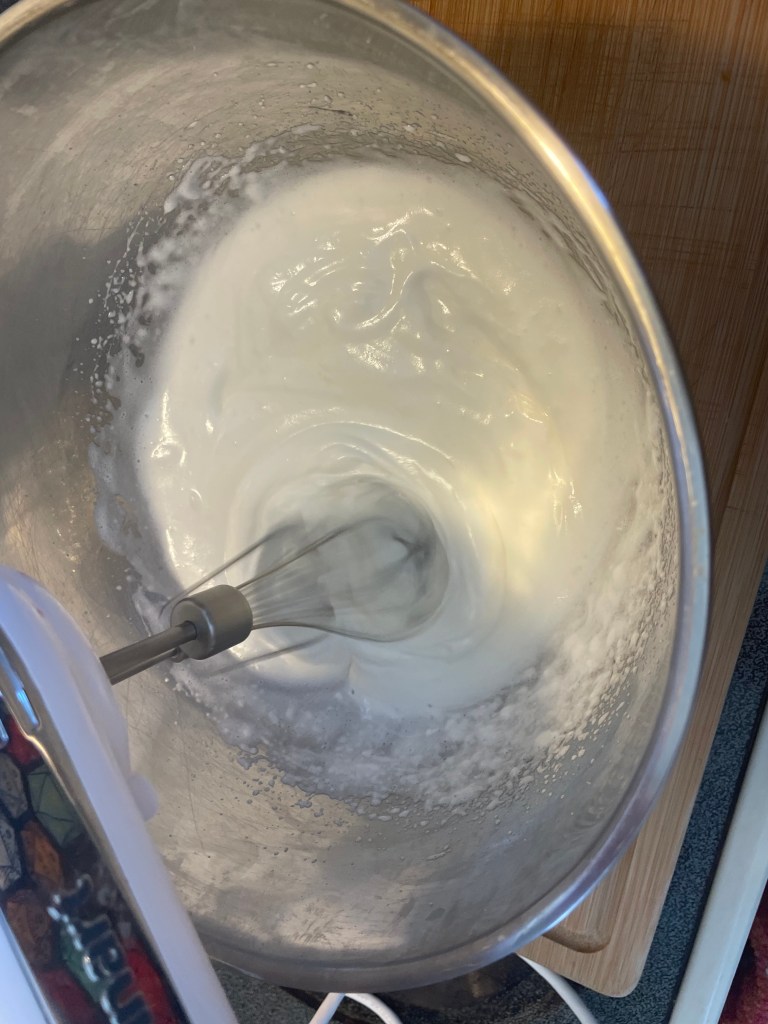
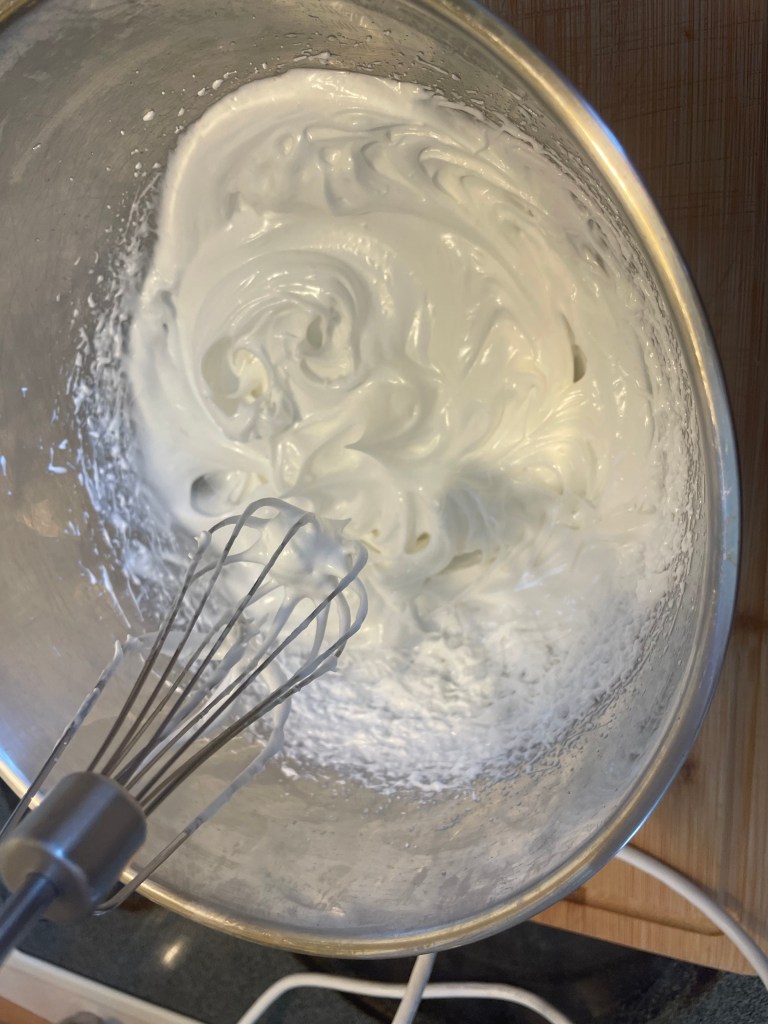
- Stop beating at this point and add 1/3 of the superfine sugar. Beat on medium-high speed for 5 seconds, then add another 1/3 of the superfine sugar. Beat for another 5 seconds then, with the mixer still running, add the last 1/3 of the sugar. Continue beating on medium-high speed until the meringue is stiff and glossy. This is the moment where, if you choose to do so, you can turn the bowl over and scare your family and friends by threatening to upend the contents on their heads. This is tradition. You should do this.
- If using food coloring, gently fold it in at this point.
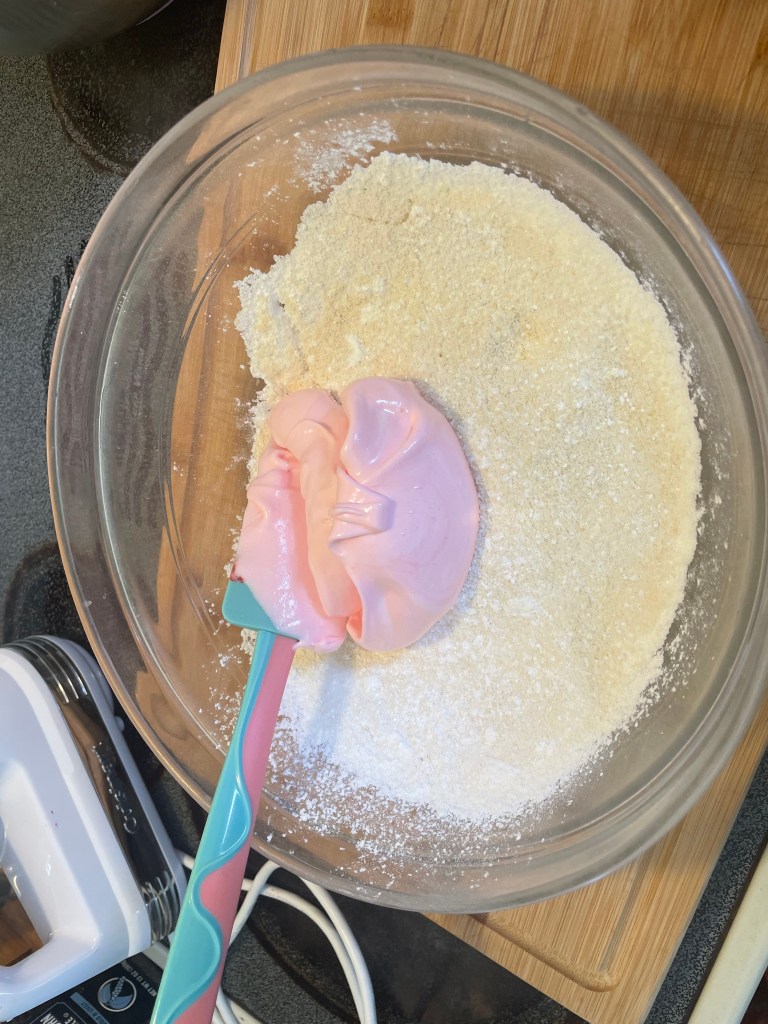
- Sift the almond flour and confectioner’s sugar together in a second large glass or metal mixing bowl.
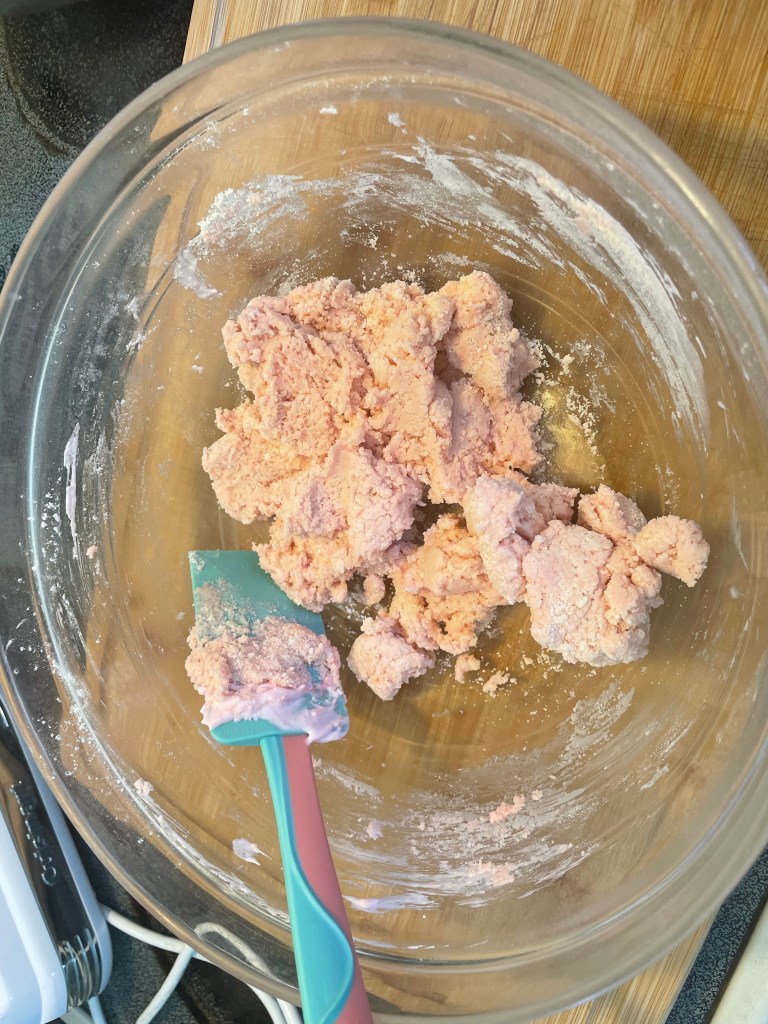
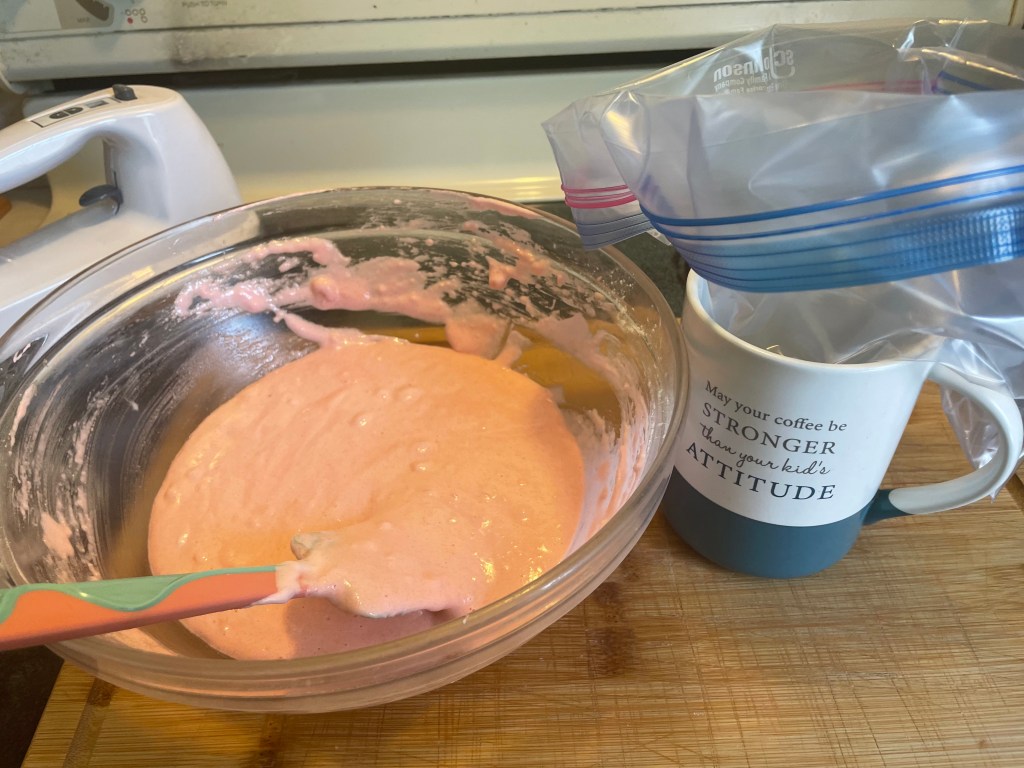
- Slowly fold the meringue into the almond flour confectioner’s sugar mixture in 3 additions, gently folding and mixing until each 1/3 is combined before adding the next portion of egg whites. Once all of the meringue is in, continue gently folding until the batter is the consistency of thick honey. Drop some of the batter off your spatula into the bowl to make the form of the figure 8. The figure 8 should take no more than 10 seconds to sink into the rest of the batter in the bowl. If the batter is too thick, the figure 8 will take longer to dissipate. Continue gently folding. If the figure 8 disappears too quickly, the batter has been over-mixed and is too thin. It will no longer be the ideal macaron but is still worth baking because it will taste good.
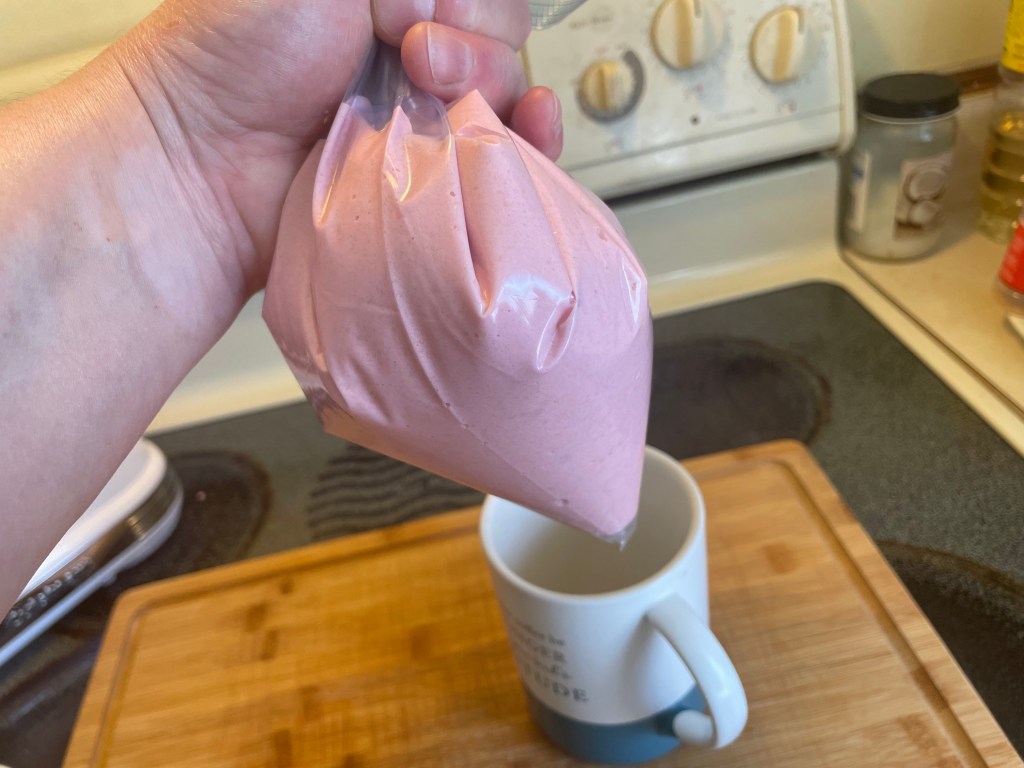
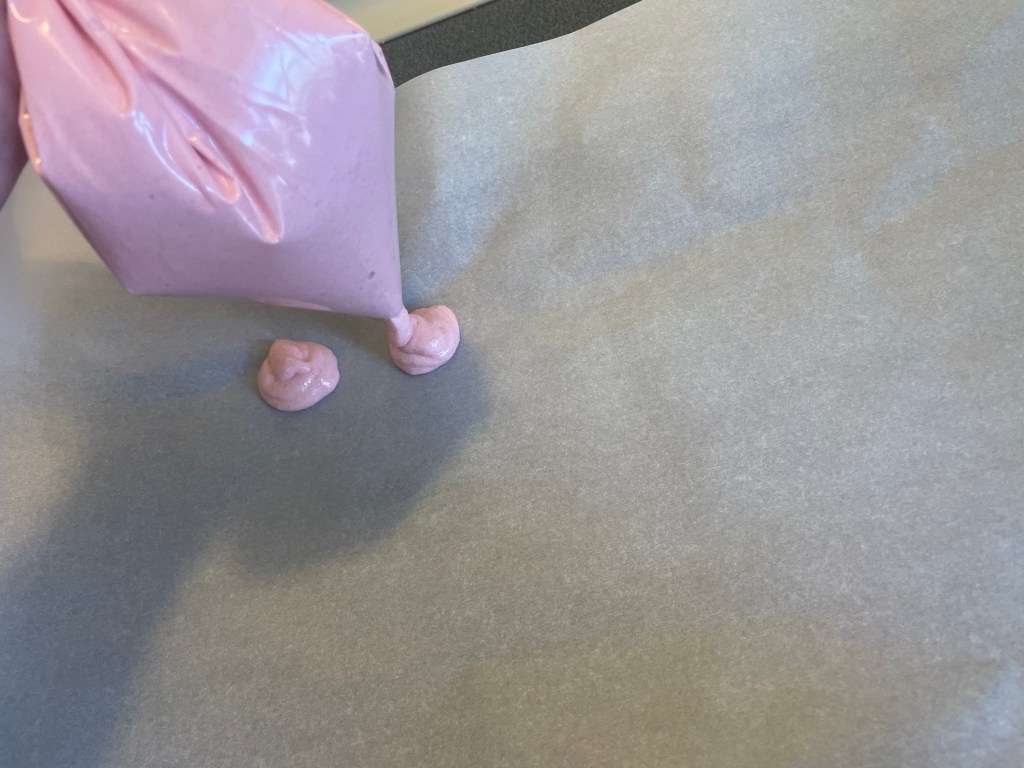
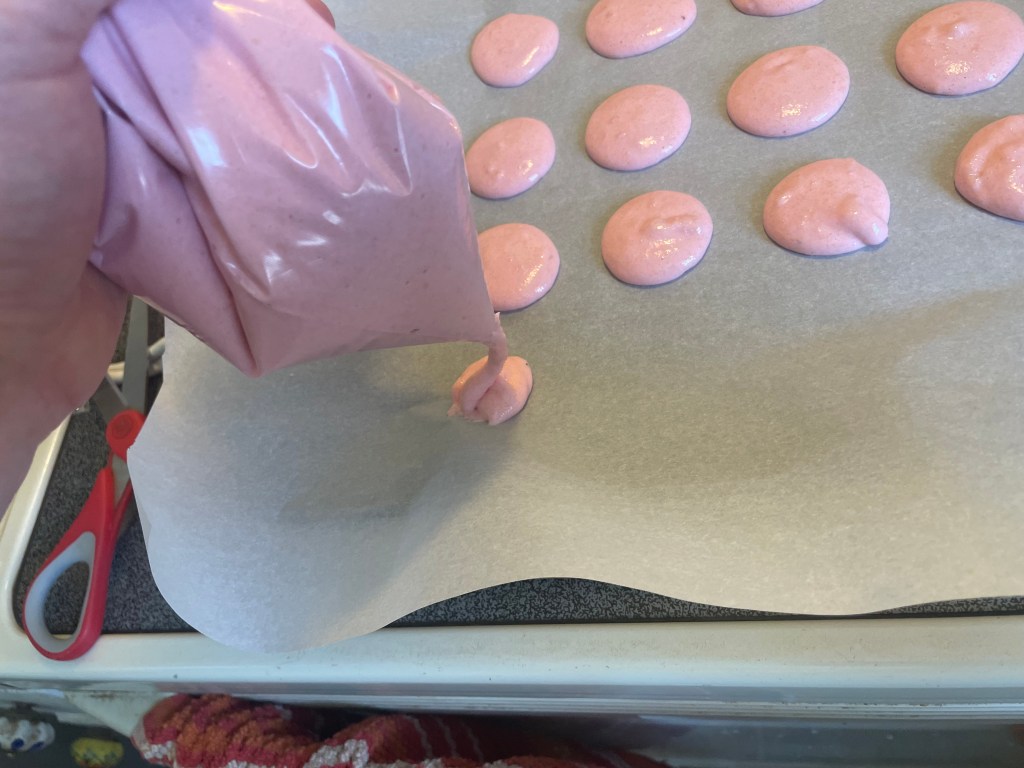
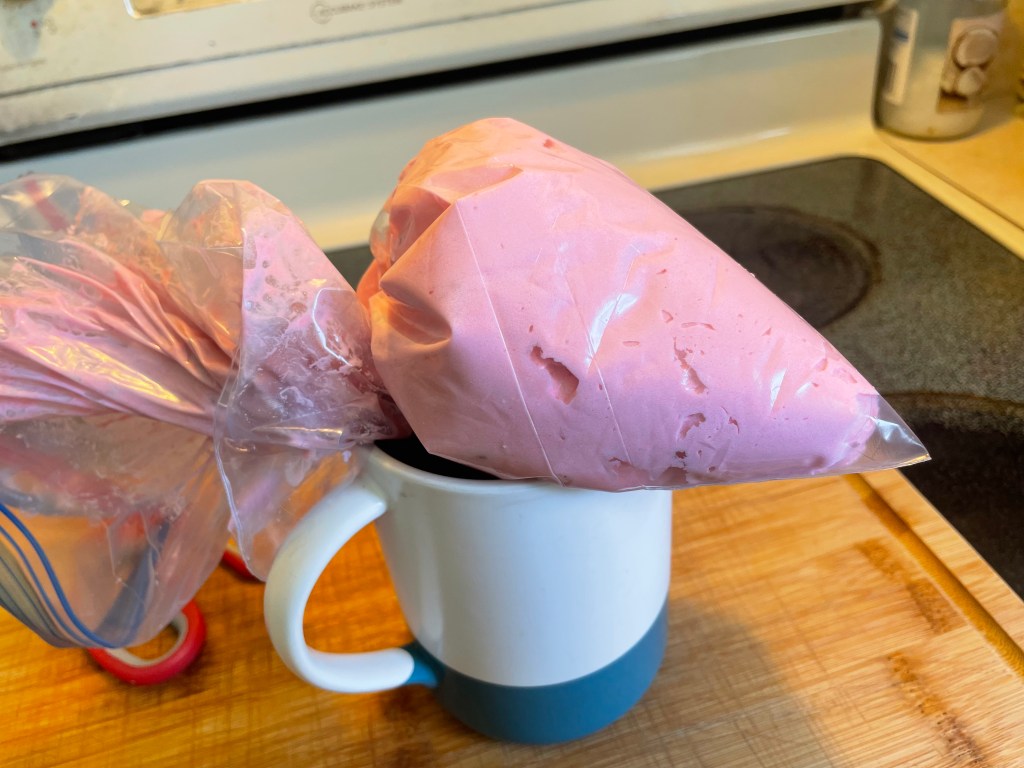
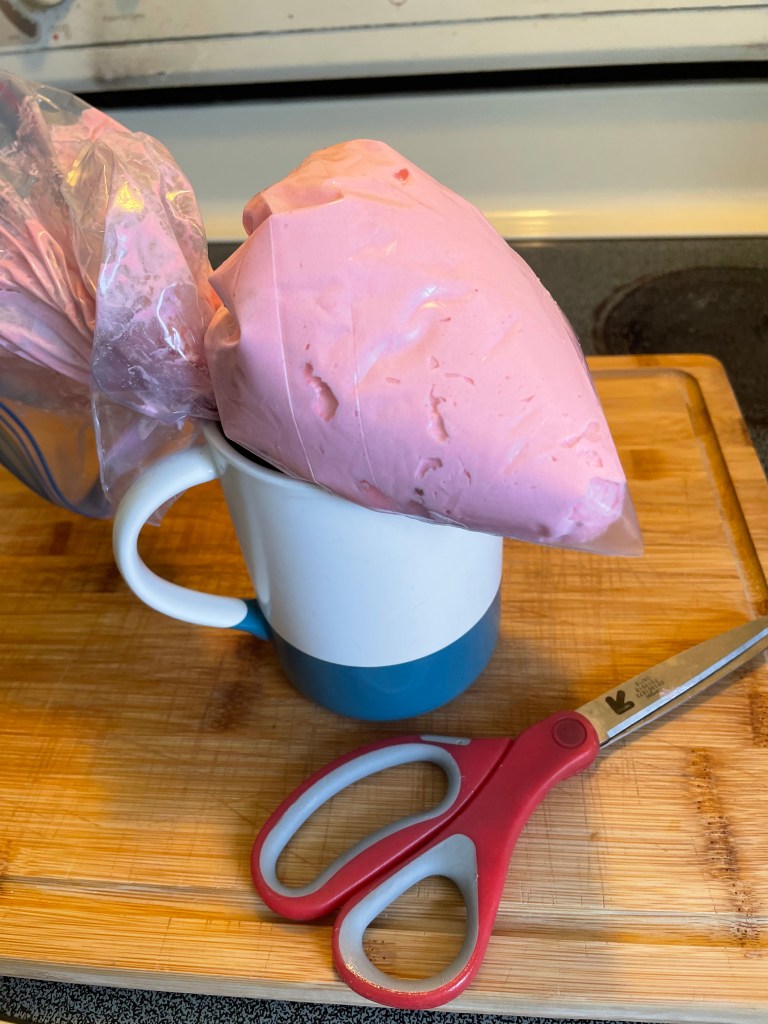
- Spoon the prepared macaron batter into a piping bag fitted with a medium round piping tip (or, if you are mid-house move like me, make do with a Ziploc bag that you load up with batter before snipping the very corner off the bag to make a piping tip). Holding the piping bag at a 90 degree angle over the baking sheet, pipe the batter out into 3-4cm/1.5-2 inch rounds about 2-4cm/1-2 inches apart on the prepared baking sheets. When you are done piping, tap the sheet on your counter to pop any air bubbles in the batter. Then use a toothpick to pop any remaining air bubbles.
- Leave the piped macarons to dry for 30-60 minutes. The tops of the batter rounds should be tacky, having formed a skin. This step is important to allow the cookies to rise properly and keep their shape (the highly sought-after, elusive feet that any truly self-respecting macaron is expected to develop).
- While your macarons are drying, preheat the oven to 165C/325F.
- Bake for 13-15 minutes until the macaron shells have set. They should not be wobbly on the top when gently tested with your finger. And also, the feet again. They should have feet (a distinctive ruffled border around the base of the cookie shell, not the kind with adorable little toes, alas).
- Remove from the oven and allow the macarons to cool on the baking sheet for at least 15 minutes before attempting to move them to a cooling rack (they may stick if disturbed too early).
- When cool, sandwich two shells together with your desired filling. Either piped in (more elegant and neat), or smeared over the halves with a knife (still delectable). Serve immediately or cover and place in the fridge for 12-24 hours for the flavors to come together. Allow to come back to room temperature before serving.
- Leftovers can be refrigerated for up to 5 days.


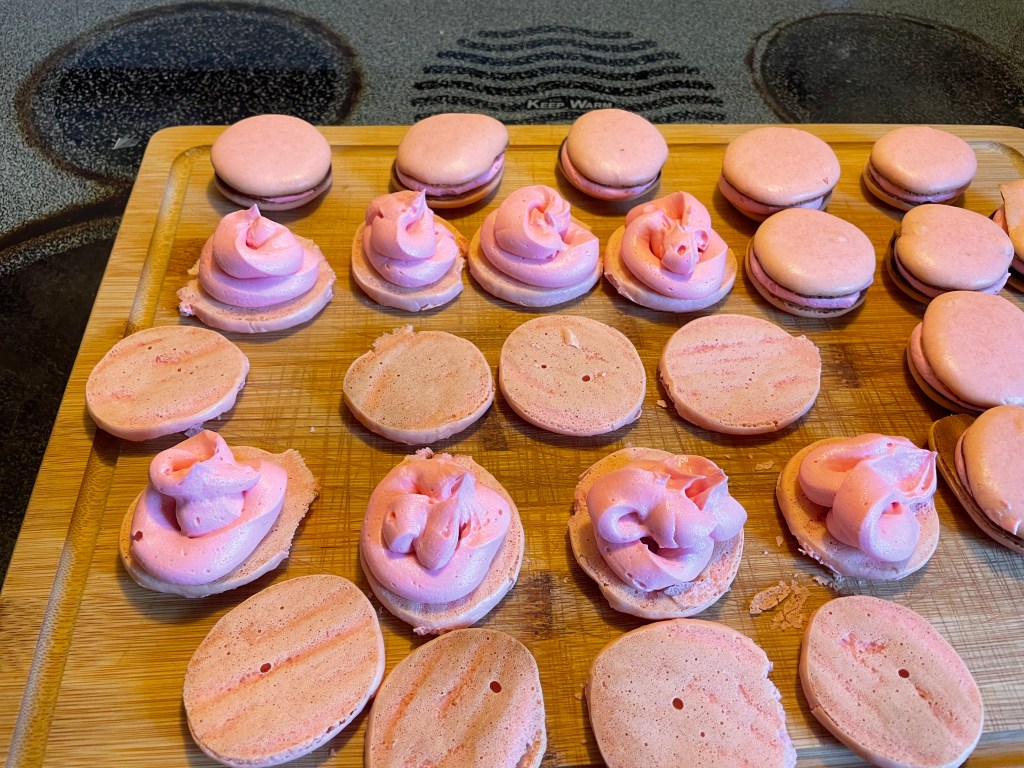


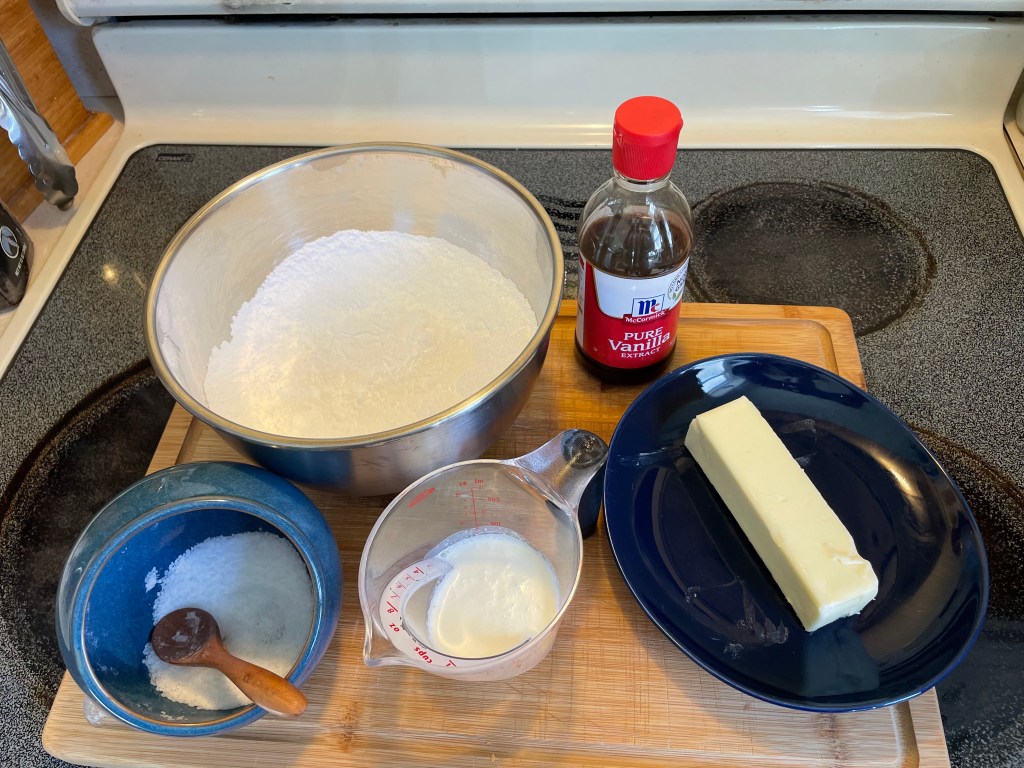
Vanilla Buttercream Filling
Makes approximately 1 cup.
I used 1/2 of the recipe linked in the macaron article from Sally’s Baking Recipes for this frosting.
Ingredients:
115g/1/2 cup unsalted butter, softened to room temperature
240-300g/2-2.5 cups confectioner’s sugar, sifted to remove any lumps
30ml/2tbsp heavy cream, at room temperature
5g/1tsp pure vanilla extract (I also added red food coloring to this batch)
Salt, a pinch.
Method:
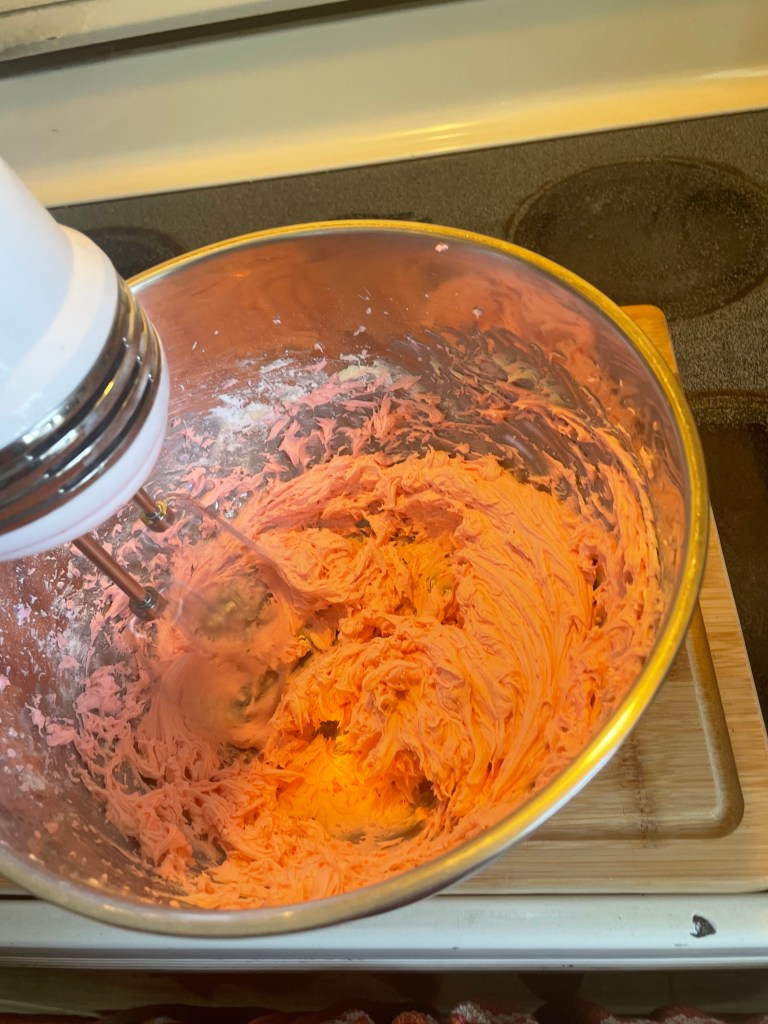
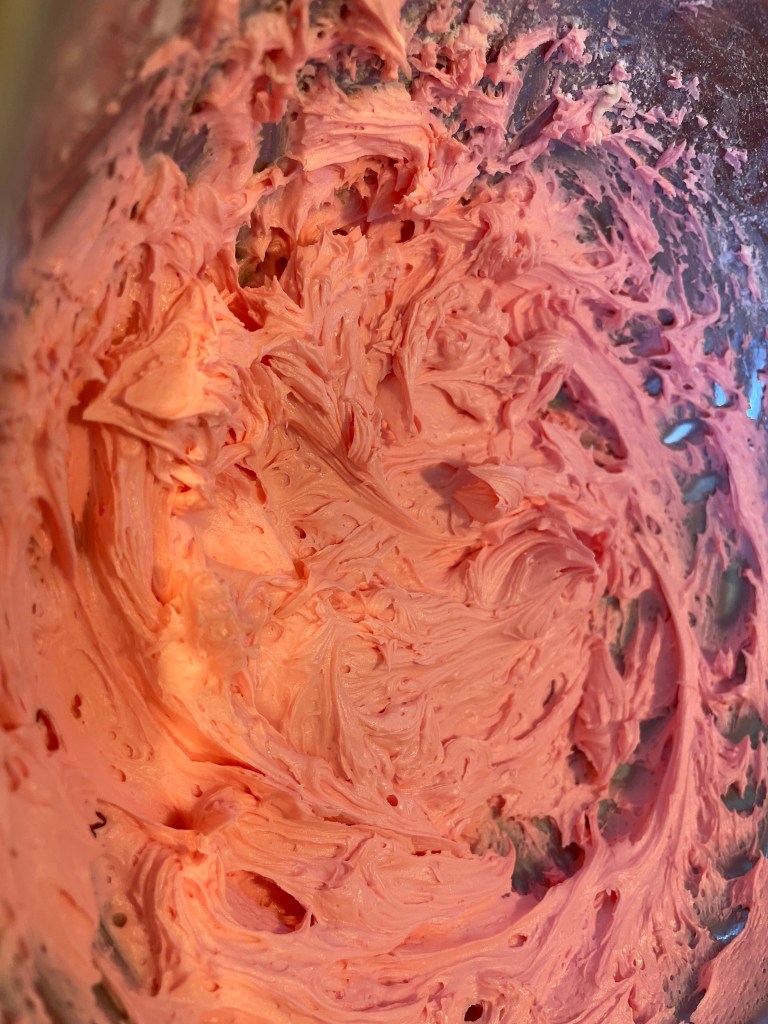
- Using a handheld or stand mixer fitted with the paddle attachment, beat the butter until creamy (on medium speed, this will take approximately 2 minutes). Add 240g/2 cups of confectioner’s sugar, the heavy cream, the vanilla extract, and the food coloring. Beat on low speed for 30 seconds, then increase the mixer speed to medium-high and beat for 2 minutes. Add a pinch of salt.
- Adjust frosting consistency as needed. Add more confectioner’s sugar if the buttercream is too thin and more heavy cream if the frosting is too thick. Continue to beat, check the consistency, and taste as you go.
- When you are happy with the resulting frosting, either use it right away or store, covered, in the refrigerator for up to 1 weeks.


Leave a comment